Slack Workflow Builder with Visualping
Slack Workflow Builder is a powerful tool that allows you to automate tasks and streamline communication within your team. We recommend using our Slack App to send notifications to public Slack channels. However, if you are interested in sending alerts to a private channel, want a custom alert format, or need to execute other custom automation, we suggest using the Slack Workflow Builder with Visualping Webhooks.
How to create a Slack workflow with Visualping Webhooks
You can refer to Slack's official workflow tutorial for the up-to-date steps.
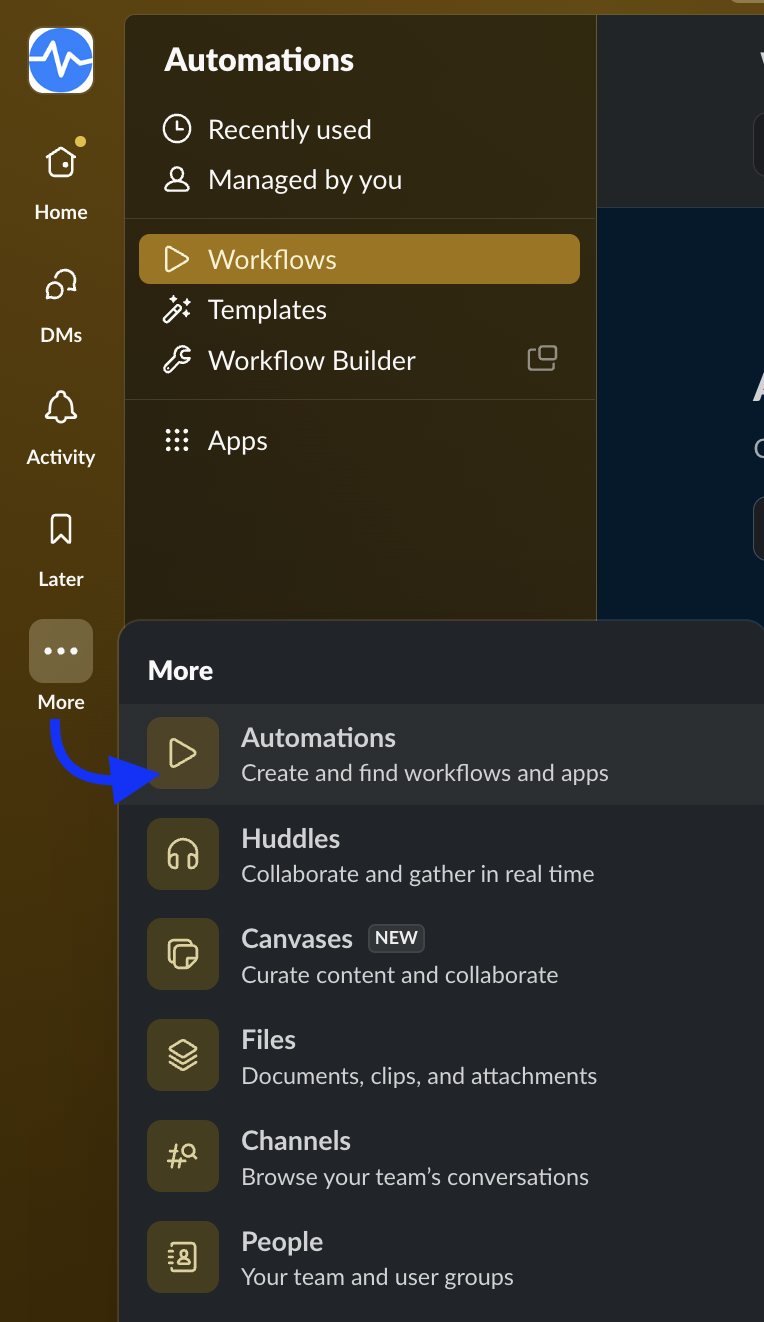
Step 1:
To create a new workflow in Slack Workflow Builder, log in to your Slack workspace on your desktop and hover over More, then select Automations.
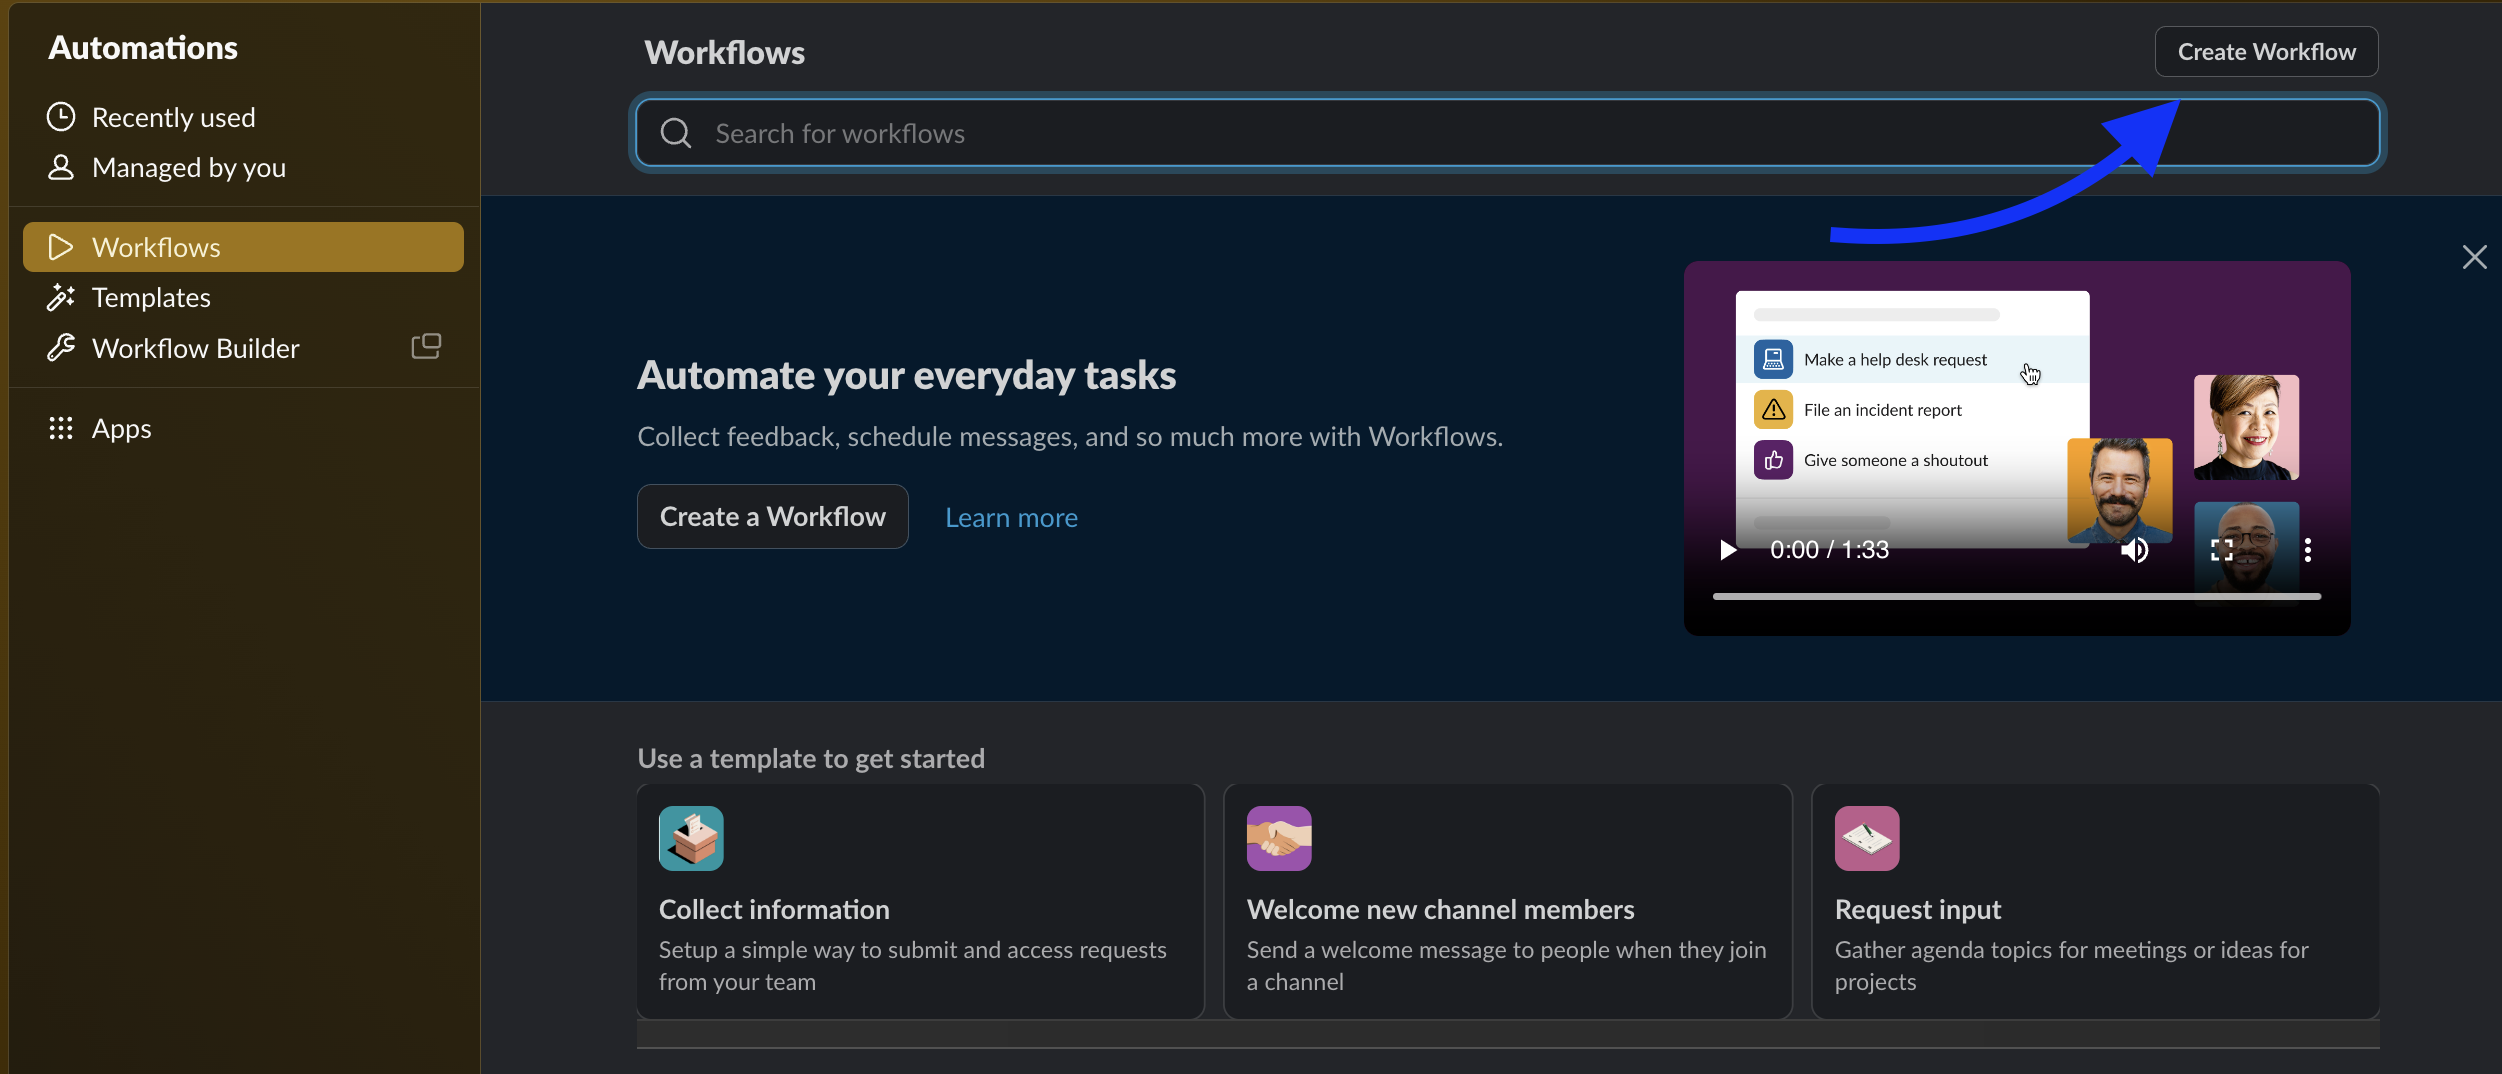
Step 2:
Click Workflows on the left-side menu and click on Create Workflow at the top right.
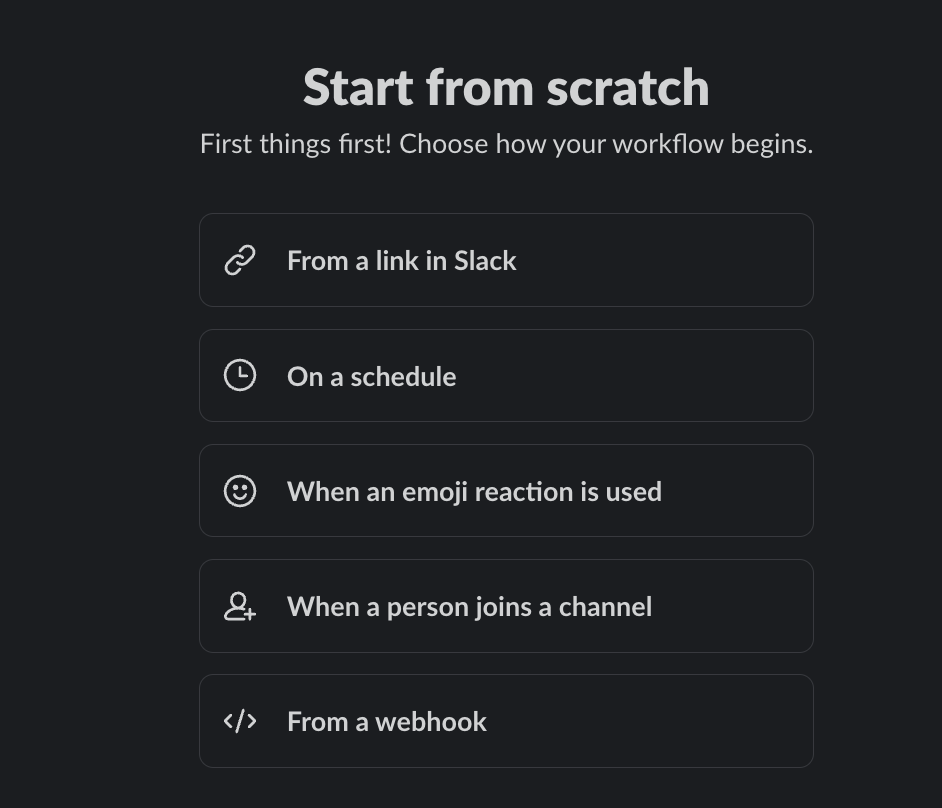
Step 3:
Select From a webhook.
Step 4:
When integrating a webhook with Slack Workflow Builder, webhook variables can be defined to pass dynamic data between the two systems. Once the webhook variable is defined, Slack can access its value and use it to perform specific actions.
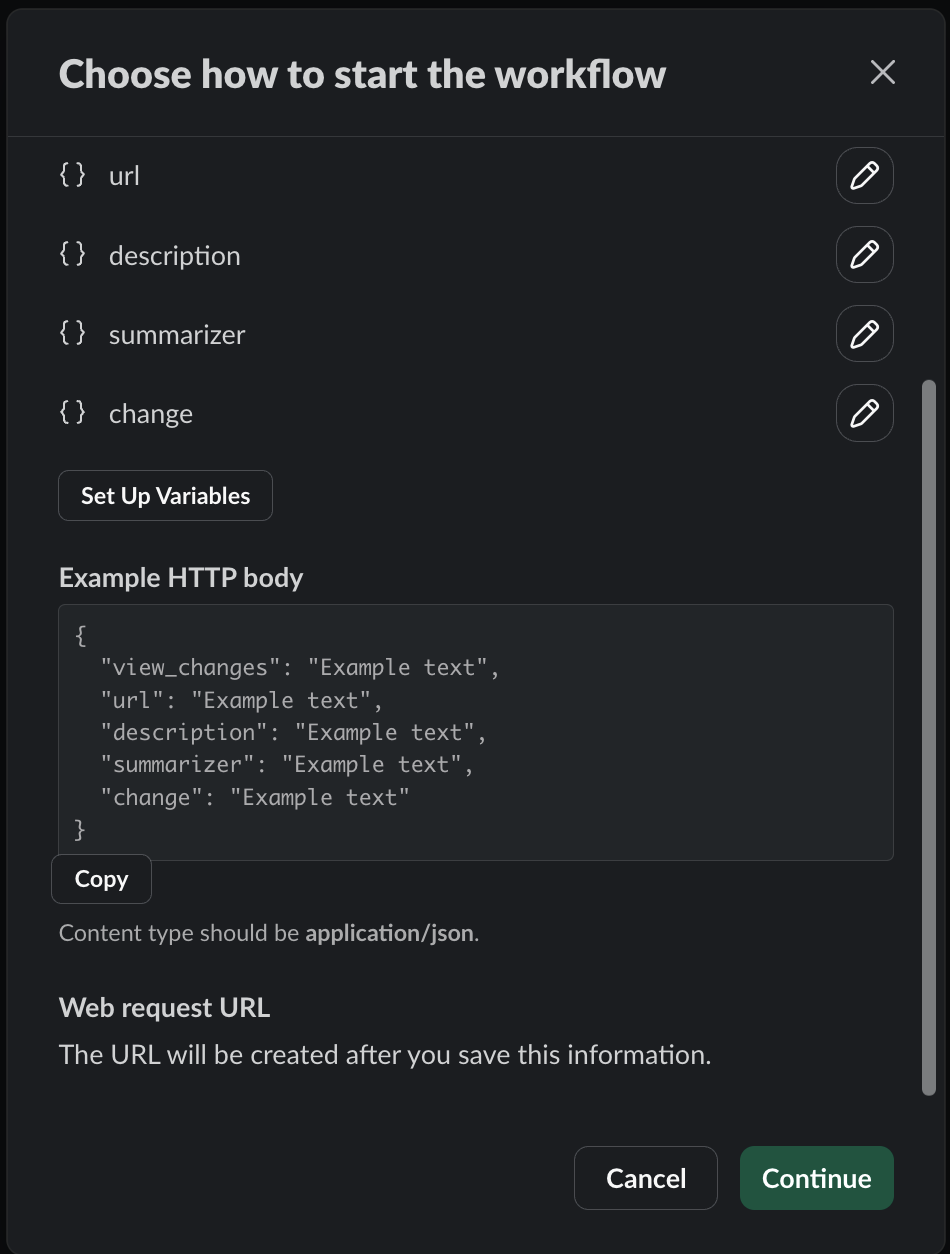
Click on Set Up Variables and enter the specific Key you want to use in your workflow. See below for a list of key options.

Visualping Webhooks variables:
Key | Data Type | Description |
job_id | Text | Unique identifier for the monitoring job. |
workspace_id | Text | Unique identifier for the workspace containing this job |
workspace_name | Text | The workspace name |
url | Text | The URL being monitored for changes |
description | Text | User-defined job name or description for this monitoring job |
datetime | Text | Timestamp when the change was detected (GMT format) |
original | Text | URL to the original (baseline) screenshot image |
current | Text | URL to the current screenshot image |
preview | Text | URL to a preview image highlighting the visual differences |
html_previous | Text | URL to the HTML snapshot of the previous page version |
html_current | Text | URL to the HTML snapshot of the current page version |
change | Text | Percentage of visual change detected (e.g., '10 %') |
view_changes | Text | Link to view the detected changes in the dashboard |
job_settings | Text | Link to the job settings in the dashboard |
visual_changes | Text | Shareable link to view visual changes |
text_changes | Text | Shareable link to view text changes |
added_text | Text | Semicolon-separated list of text content that was added to the page |
removed_text | Text | Semicolon-separated list of text content that was removed from the page |
labels | Text | Comma-separated list of user-defined labels |
summarizer | Text | AI-generated summary of the detected changes |
important | Text | Indicates if the change is flagged as important by AI Analyzer (values: "true" or "false"). Requires text input in "Alert me when:", otherwise "no analyzer call". |
good_feedback | Text | Link to submit positive feedback on the change detection |
bad_feedback | Text | Link to submit negative feedback on the change detection |
Step 5:
Once you have added the webhook variables, your workflow editor should display them in the appropriate fields. It should look something like this. Click Continue.
Step 6:
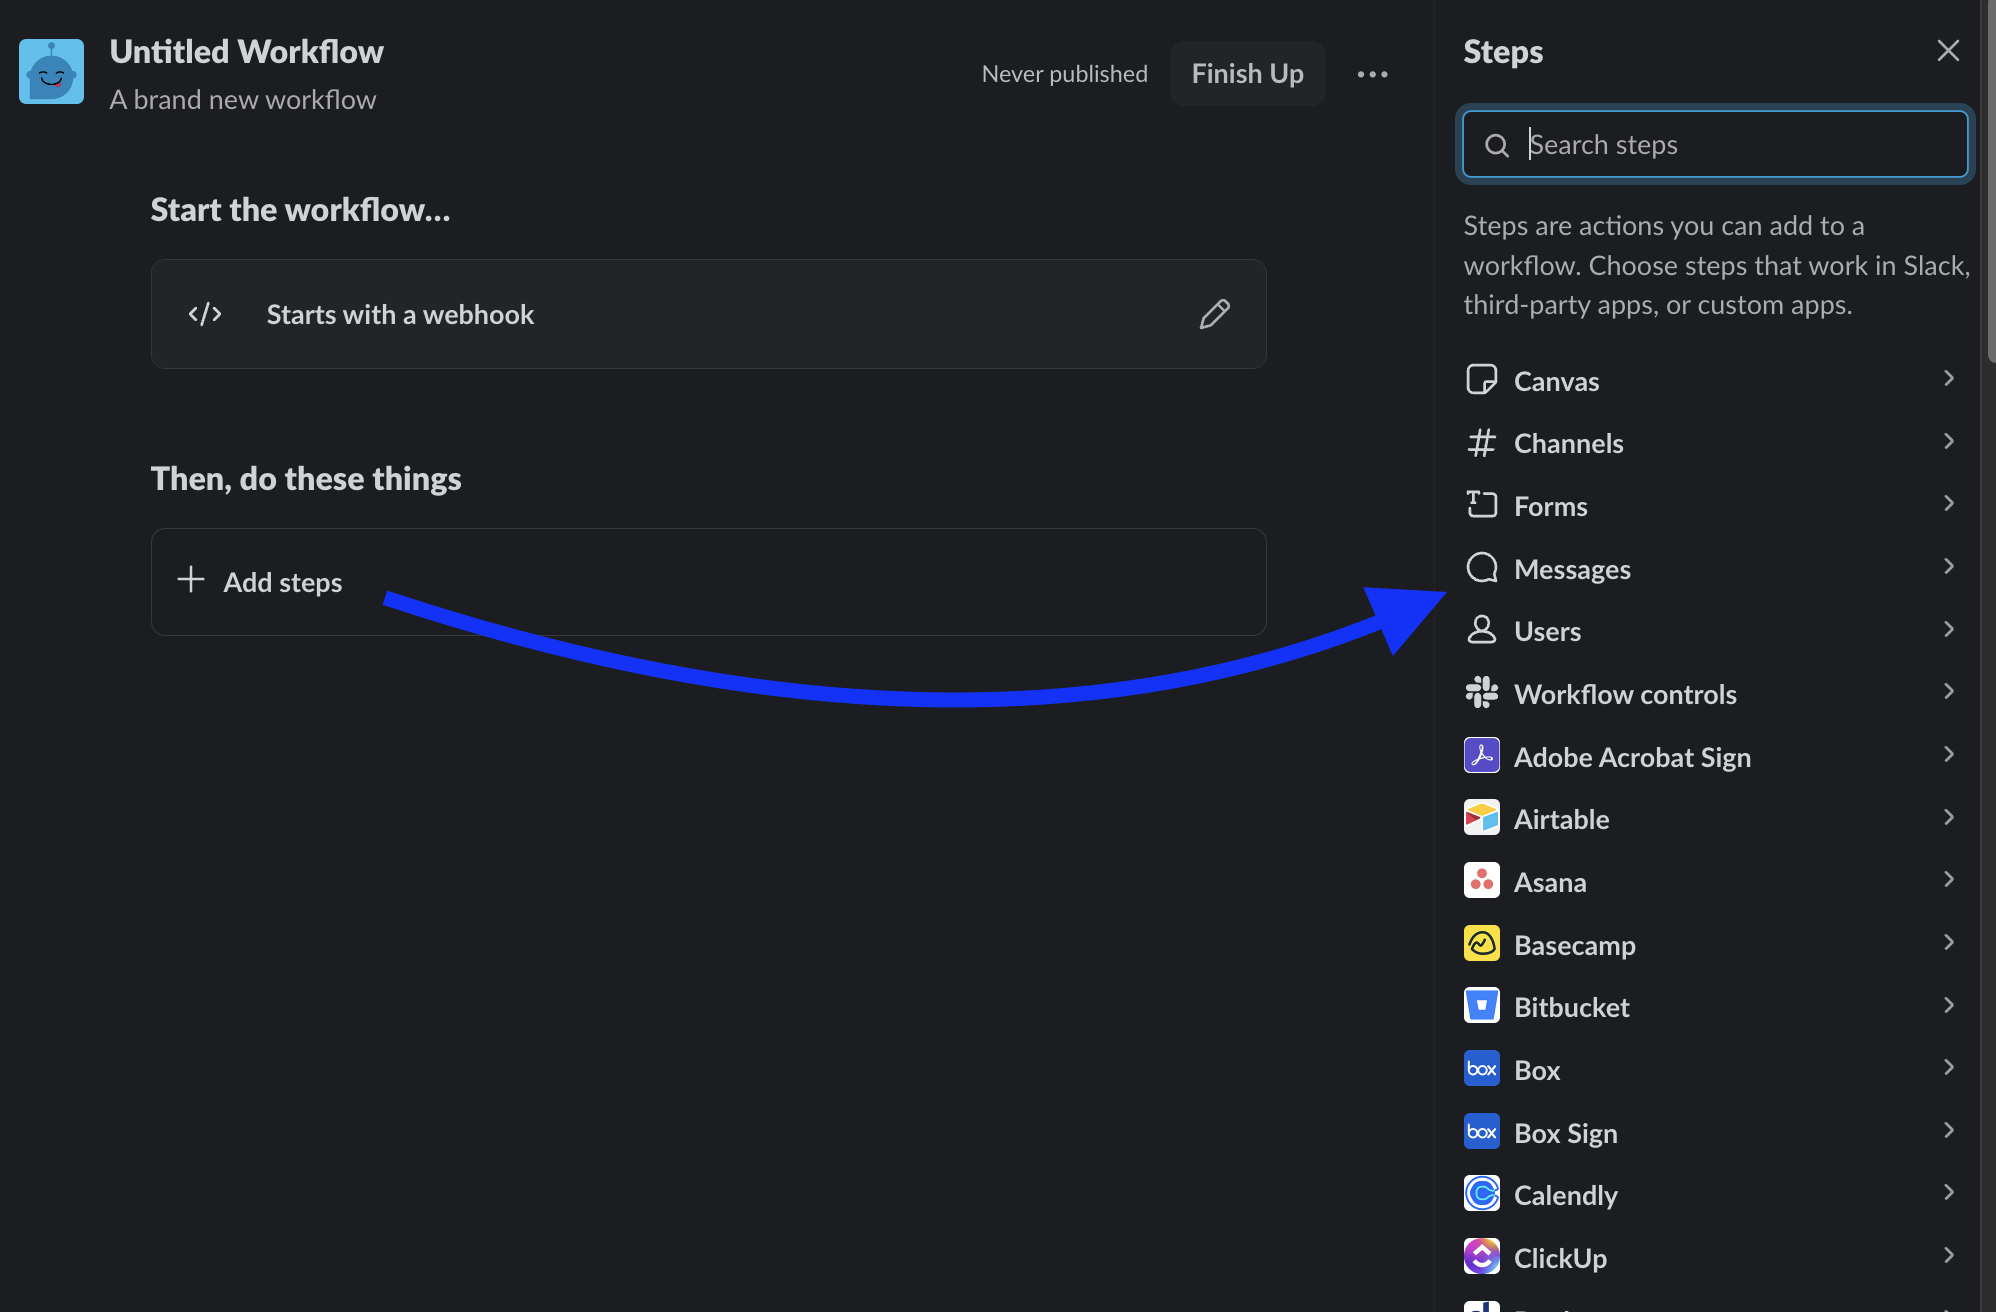
Now that we have our webhook variables configured, we can tell Slack what to do with them. To add a step to the workflow, click Add steps and select the step you want in the right-side panel. You can choose from a variety of systems and actions to automate. For this tutorial, we'll send a message to a Slack channel by selecting Messages > Send a message to a channel.
Step 7:
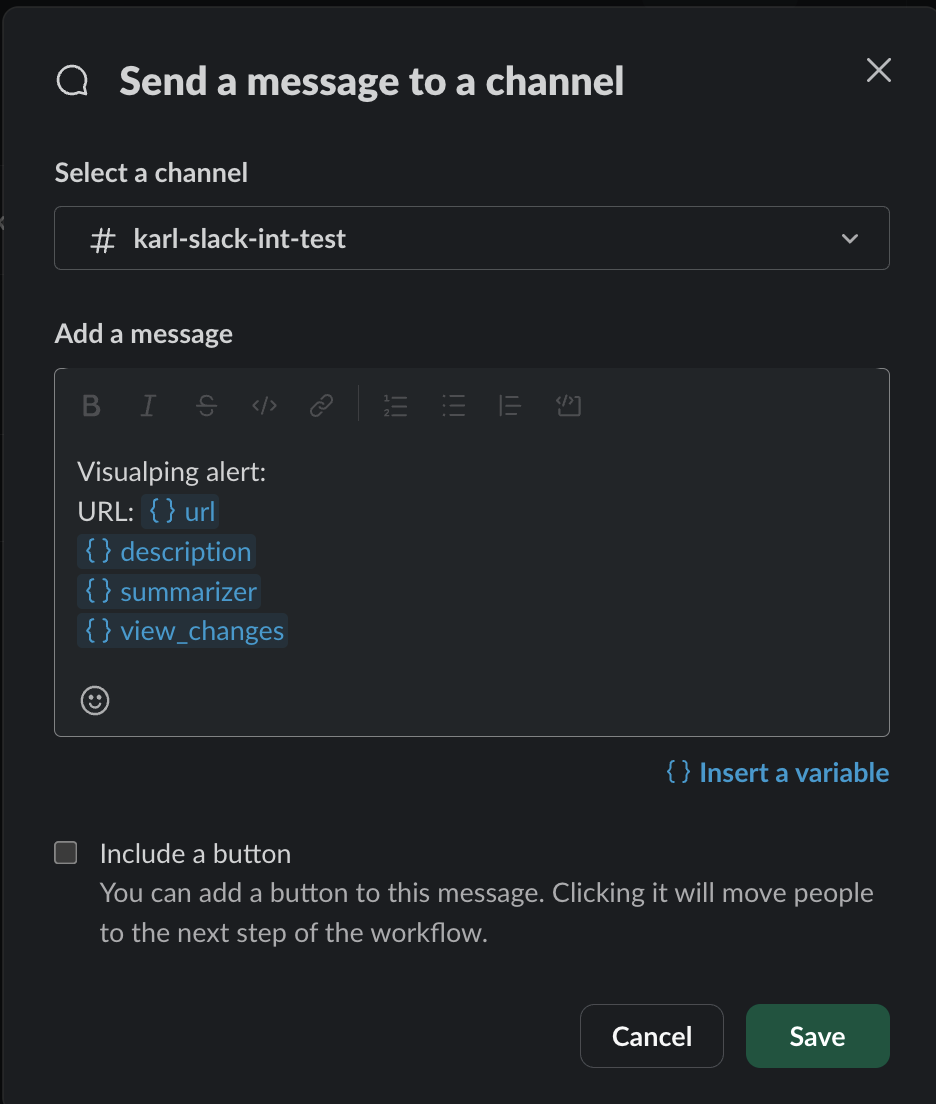
Next, select the channel, which can be either a public/private channel. In addition, you have the option to customize the message by including the webhook variables that were previously configured. To do this, simply click on the "insert a variable" button. Once finished, click Save.
Step 8:
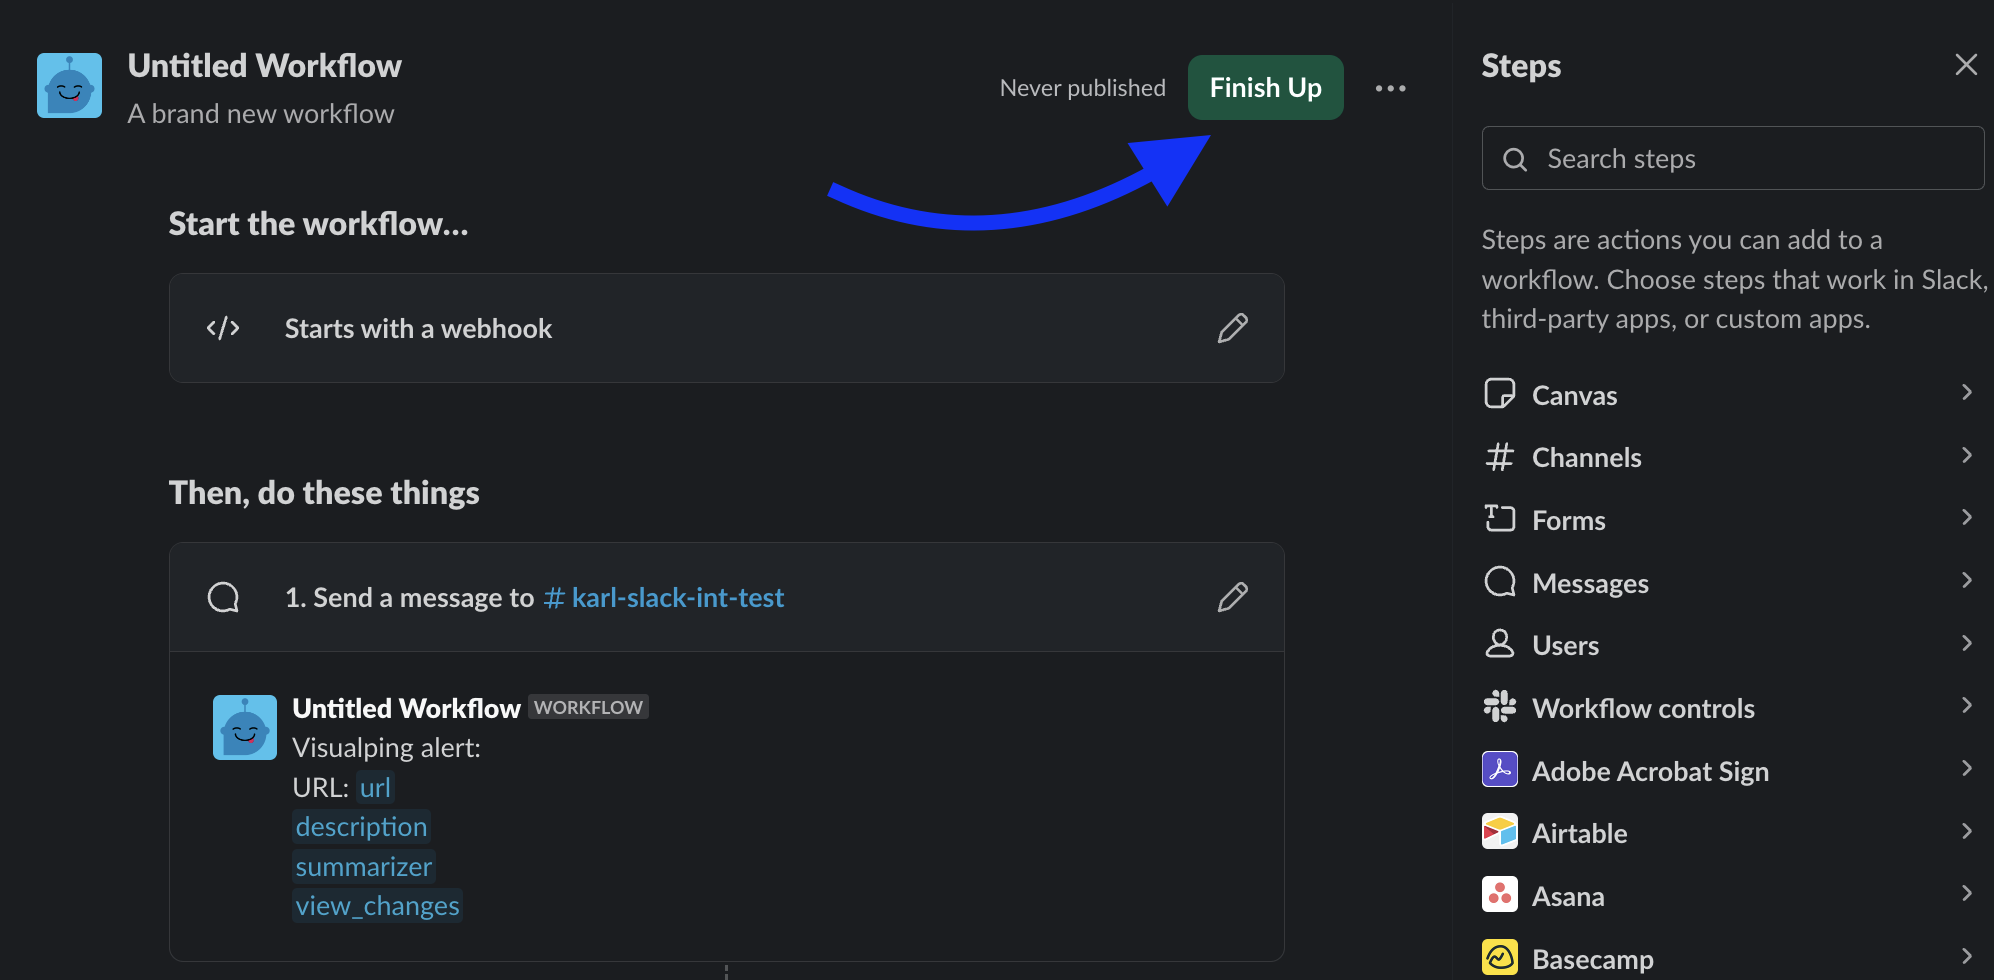
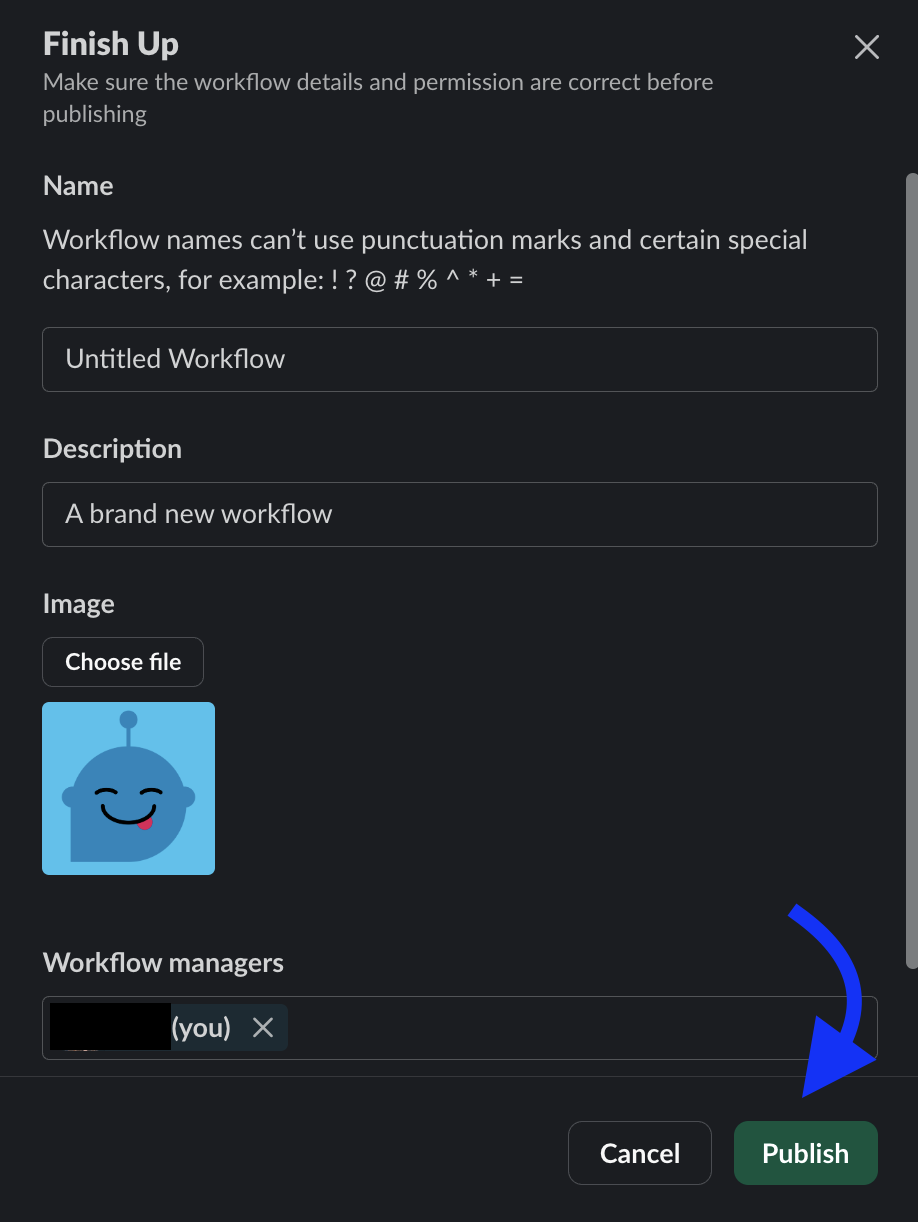
Click the Finish up button to edit the workflow details and click Publish.
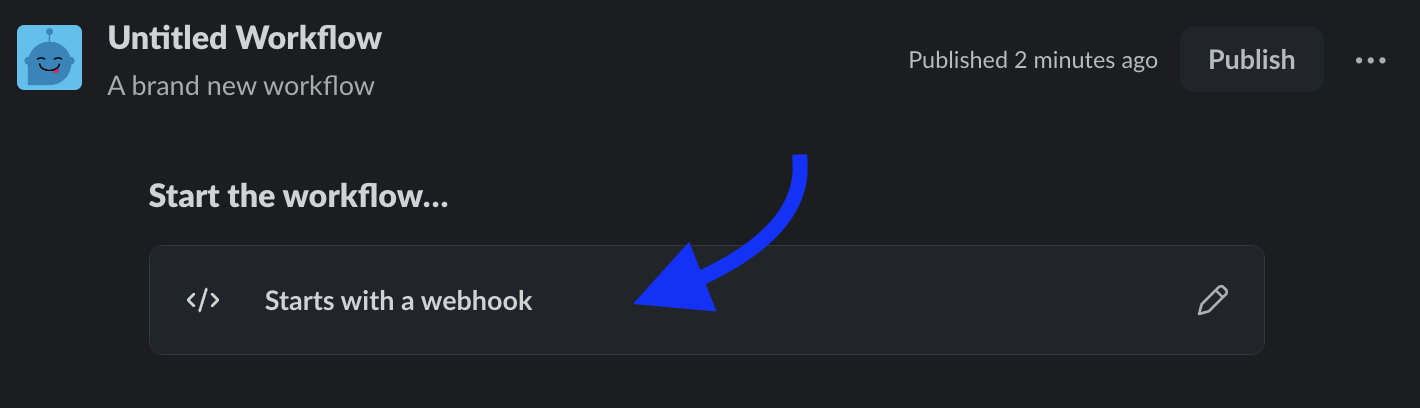
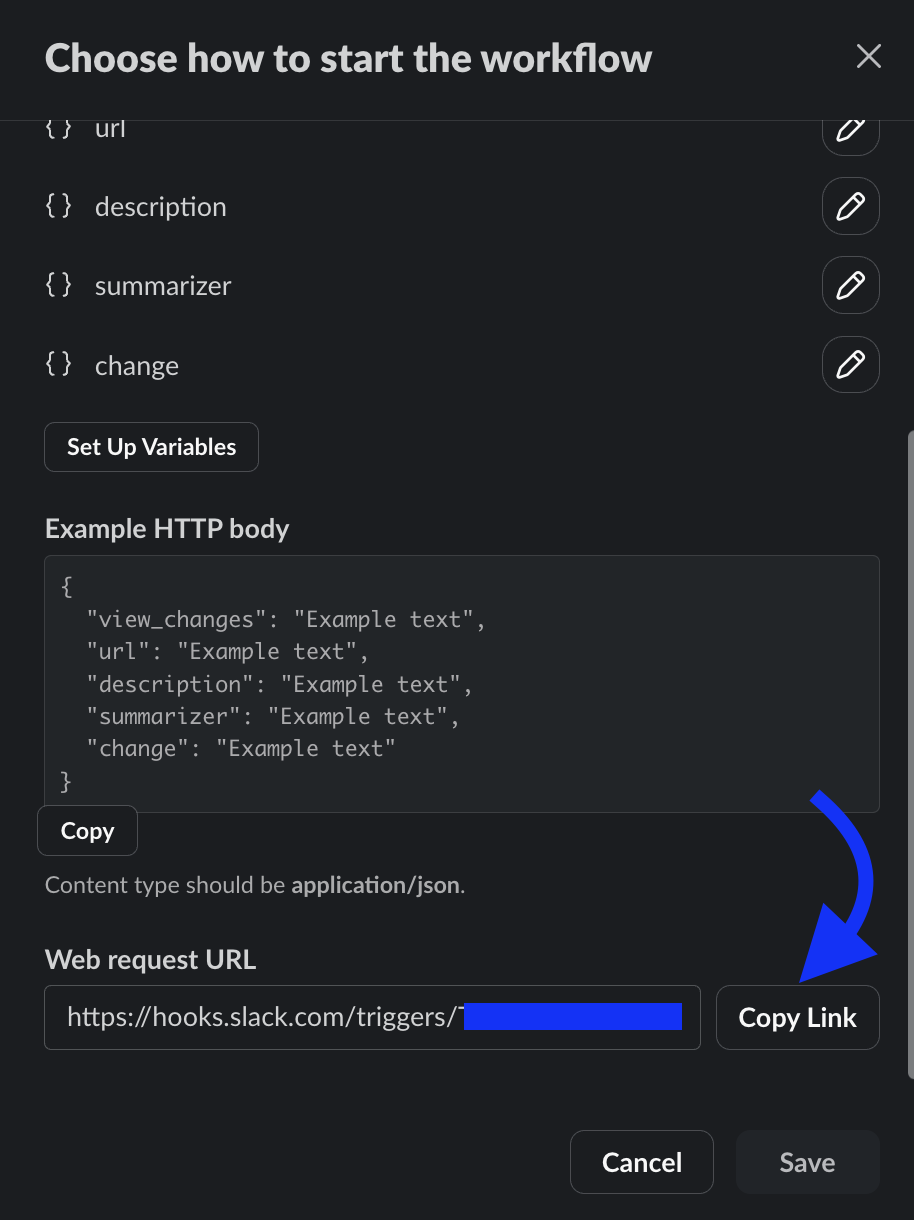
Step 9:
To find the unique webhook URL for this workflow, click on Starts with a webhook section and click Copy Link for the Web request URL. This is the final step in the Slack Workflow Builder.
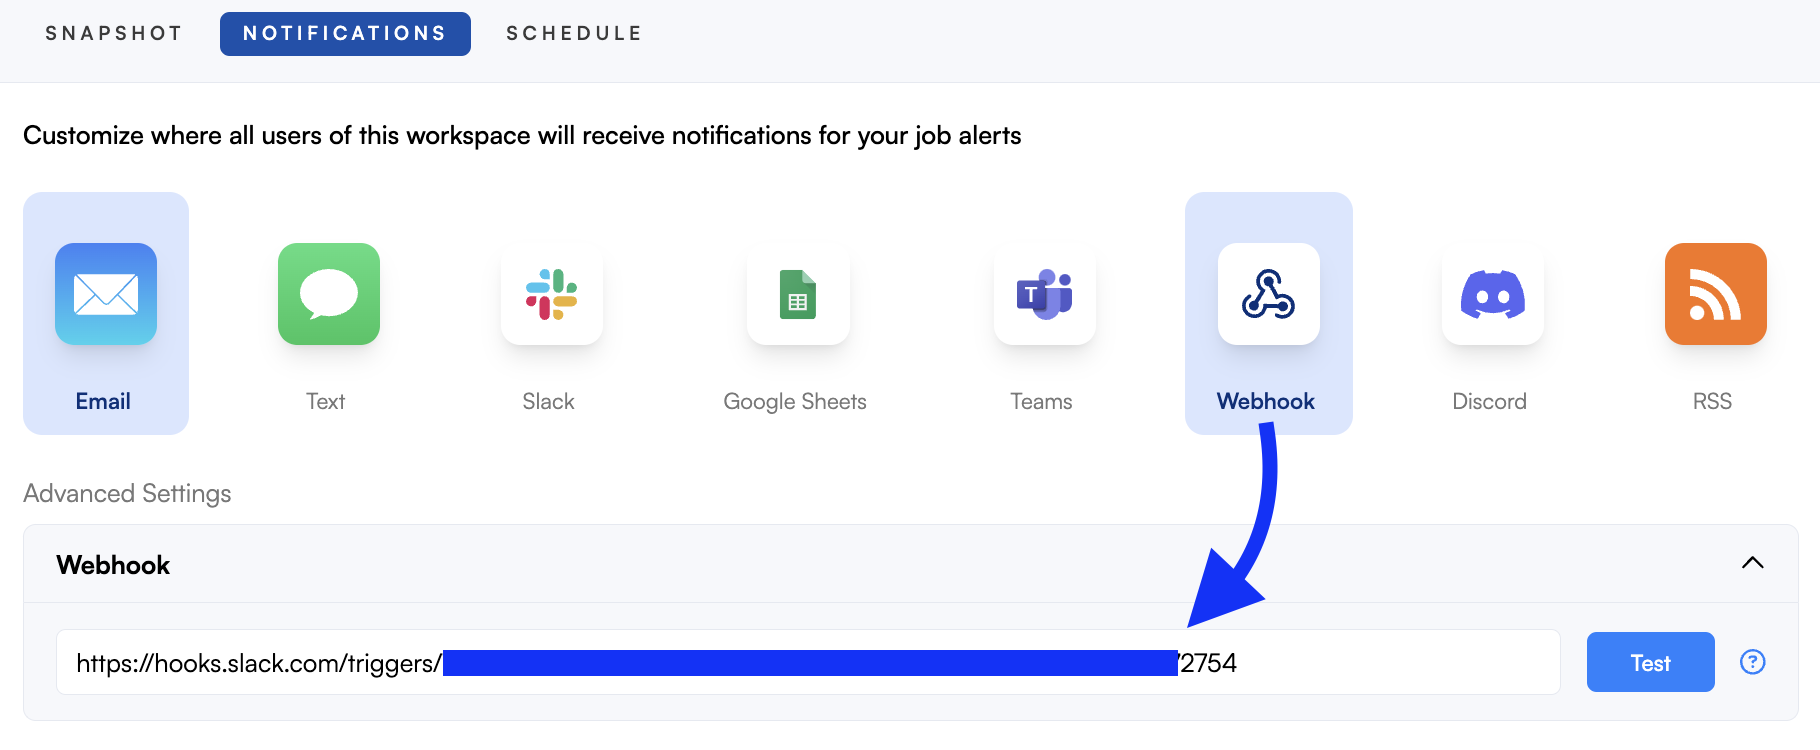
Step 10:
Head to your Visualping dashboard. Open the job settings for the job you want to edit, then click the Notifications tab. Select the Webhook option and paste the Web request URL from Slack, and click Save. You can test the integration by clicking on Test, and you'll receive a test webhook payload. This step completes the Slack Workflow Builder with Visualping.