
How to subscribe to Visualping for Business
Visualping Business is our solution designed for businesses. You'll have access to advanced features such as workspaces, bulk actions, collaboration tools, and more built for scalability.
In this article, you'll learn how to start a free Business trial and how to subscribe to a Business plan from your dashboard. If you have any questions or would like to personalize your plan for your business, you can book a time with our Sales Team.
Start a free Business trial
If you're on a Free or Personal plan, you can try Visualping Business free for 14 days. No credit card is required.
Steps:
From the Visualping dashboard, click Try Business for free in the sidebar. You can also click Start trial on the Subscriptions page (Account icon > Subscriptions under Settings), or use the Business trial invitation that appears on your dashboard after your first monitor has been checked.
Follow the prompts to create your Business organization.
What happens when your trial starts:
A Business organization and workspace are created, and you become its Admin.
Your existing monitors move into the new workspace.
Your personal account switches to the Free plan.
Note: Each user can start one Business trial. If you don't see the trial options, you may have already used your trial or already belong to a Business organization. Contact us and our team can help.
Update billing address
If you haven't subscribed to a plan yet, you must update your billing address first.
Steps:
From the Visualping dashboard, click the Account icon at the top right corner.
On the drop-down menu, select Billing under Settings.
In the Billing Address section, click on Update.
Fill out the Billing Address form and click on Update to complete.
Business trial to Business plan
After your trial has finished, you can finalize your subscription through your dashboard.
Steps:
From the Visualping dashboard, click the Account icon at the top right corner or click on Upgrade and skip to step 3.
On the drop-down menu, select Subscriptions under Settings.
On the Subscriptions page, select the number of Workspaces for your desired plan. You can click the arrow on the right to view higher business plans. You can mix and match the number of workspaces for each plan.
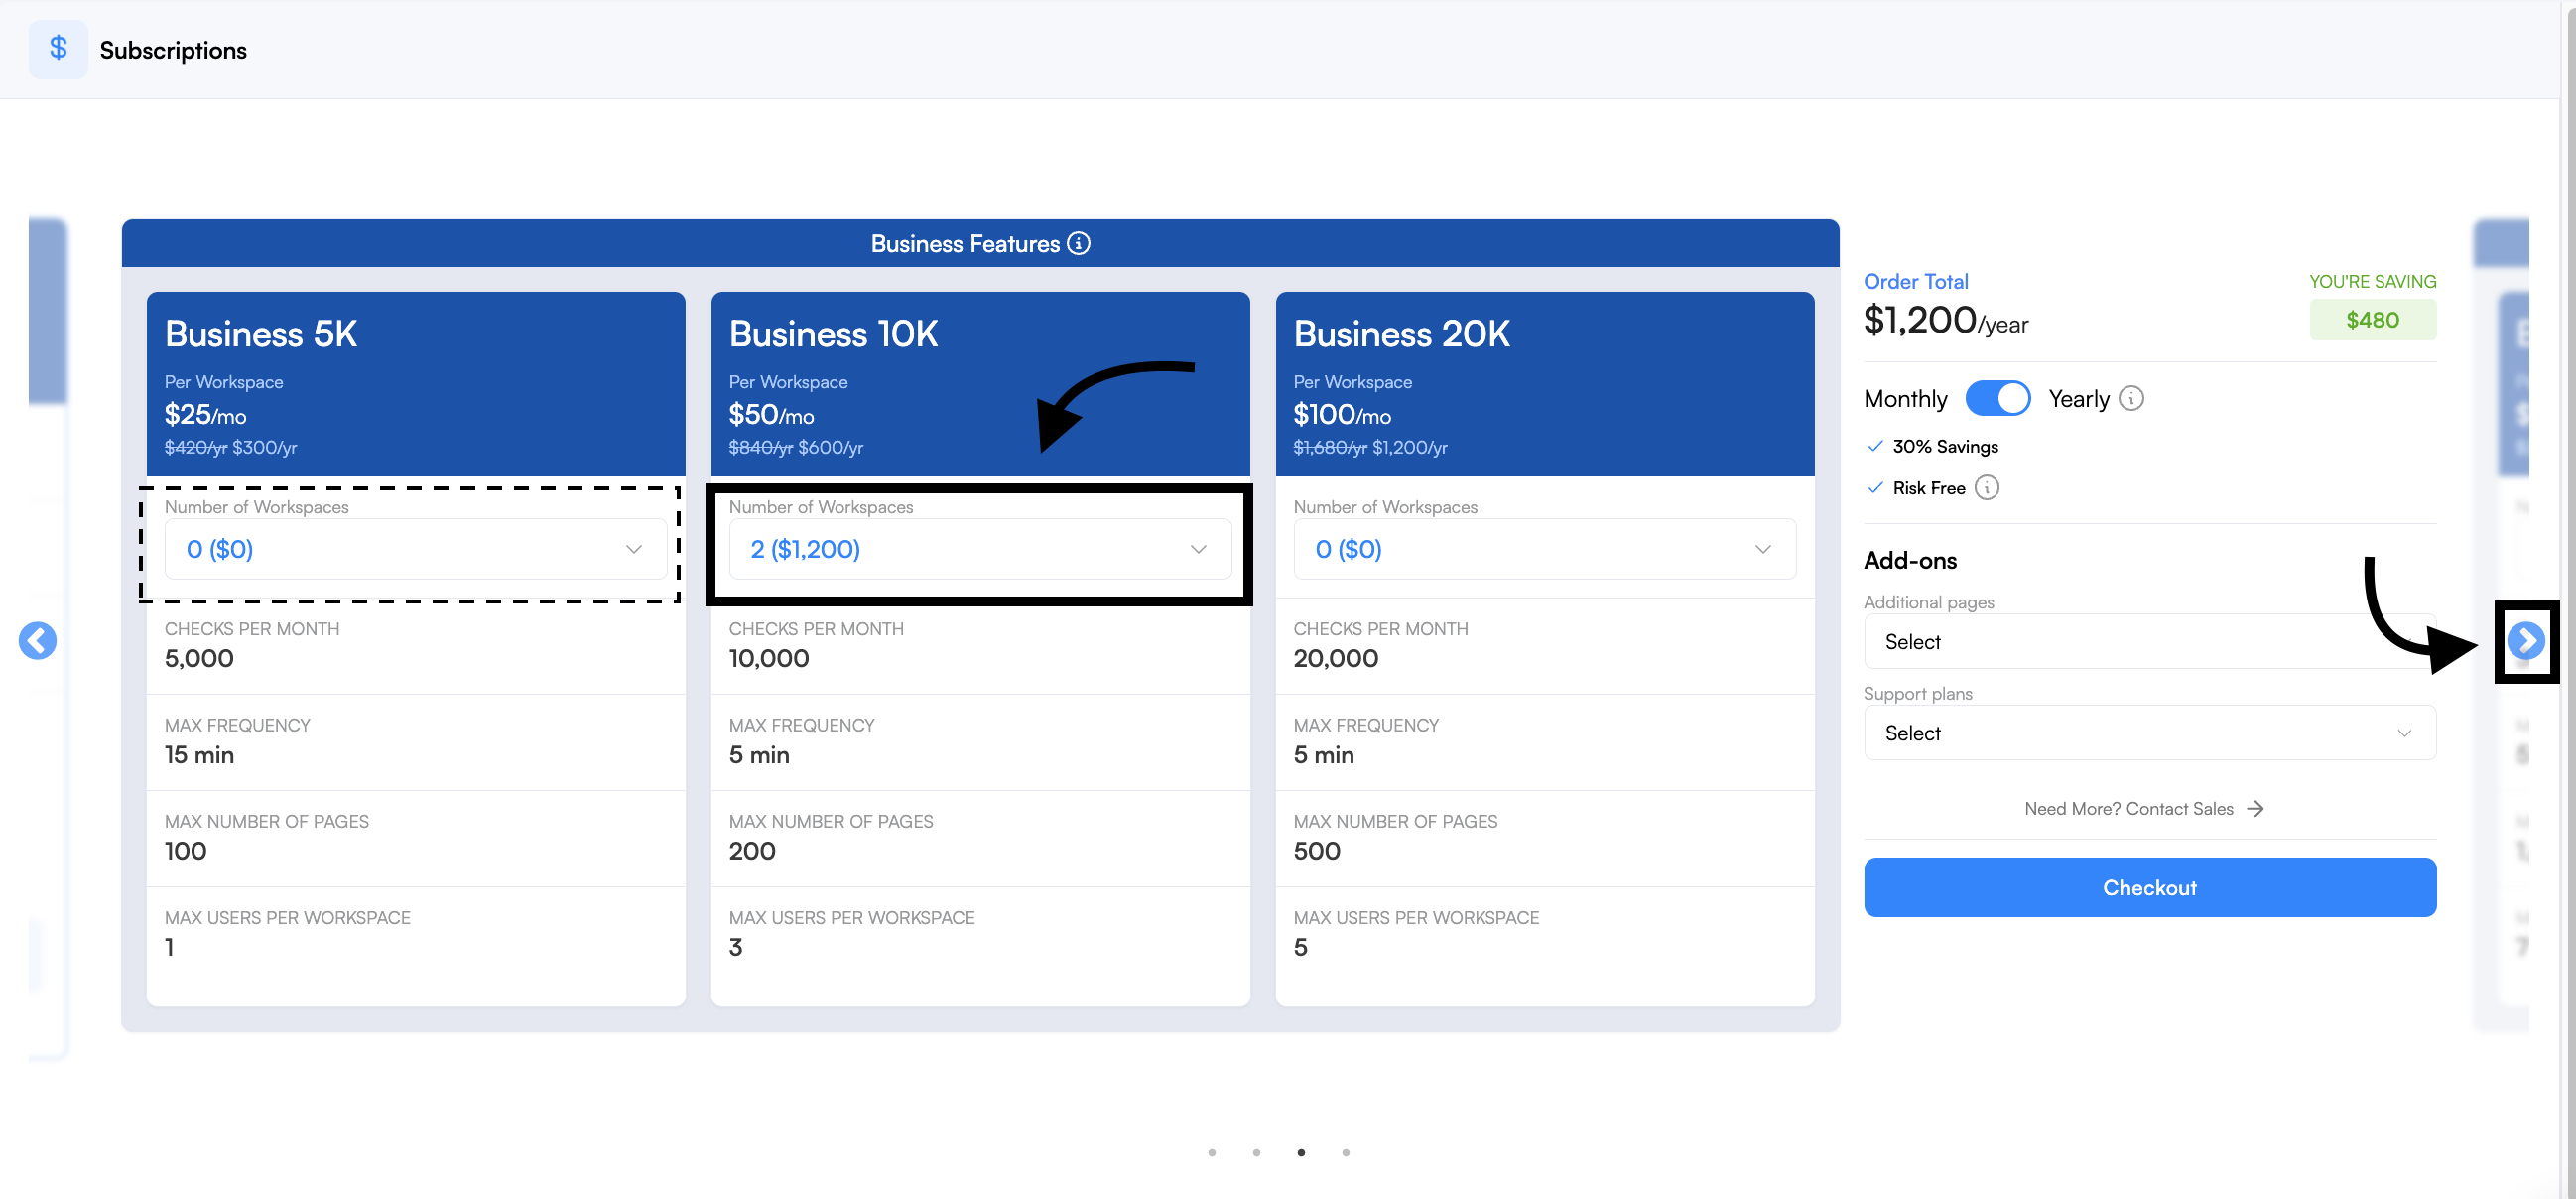
Your total will be displayed on the right side where you can toggle between monthly and annual billing (you save 30% on a yearly plan, risk-free). You can include optional Add-ons to your plan such as Additional pages and Support plans. Click on Checkout when you're done.
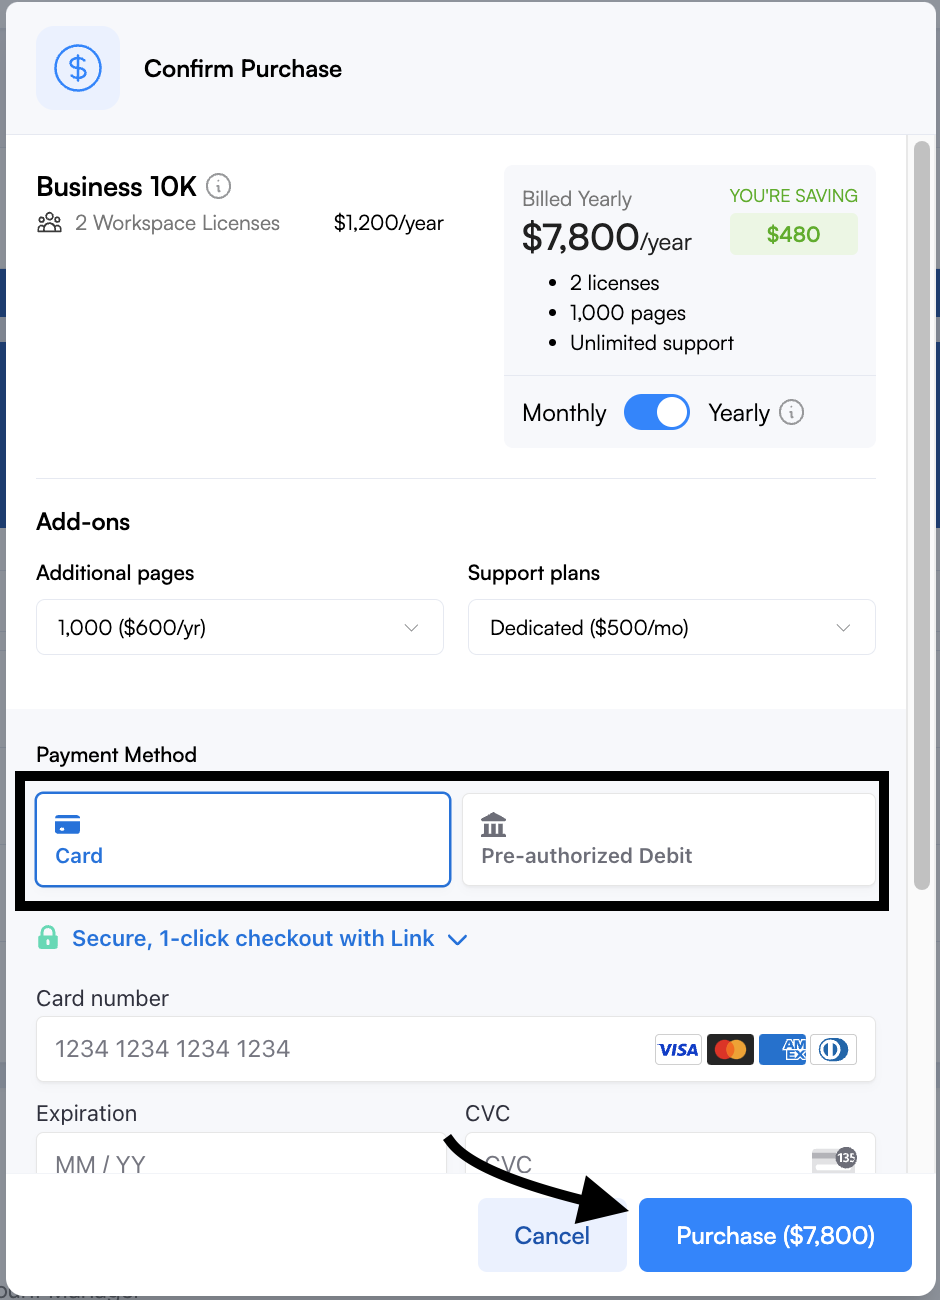
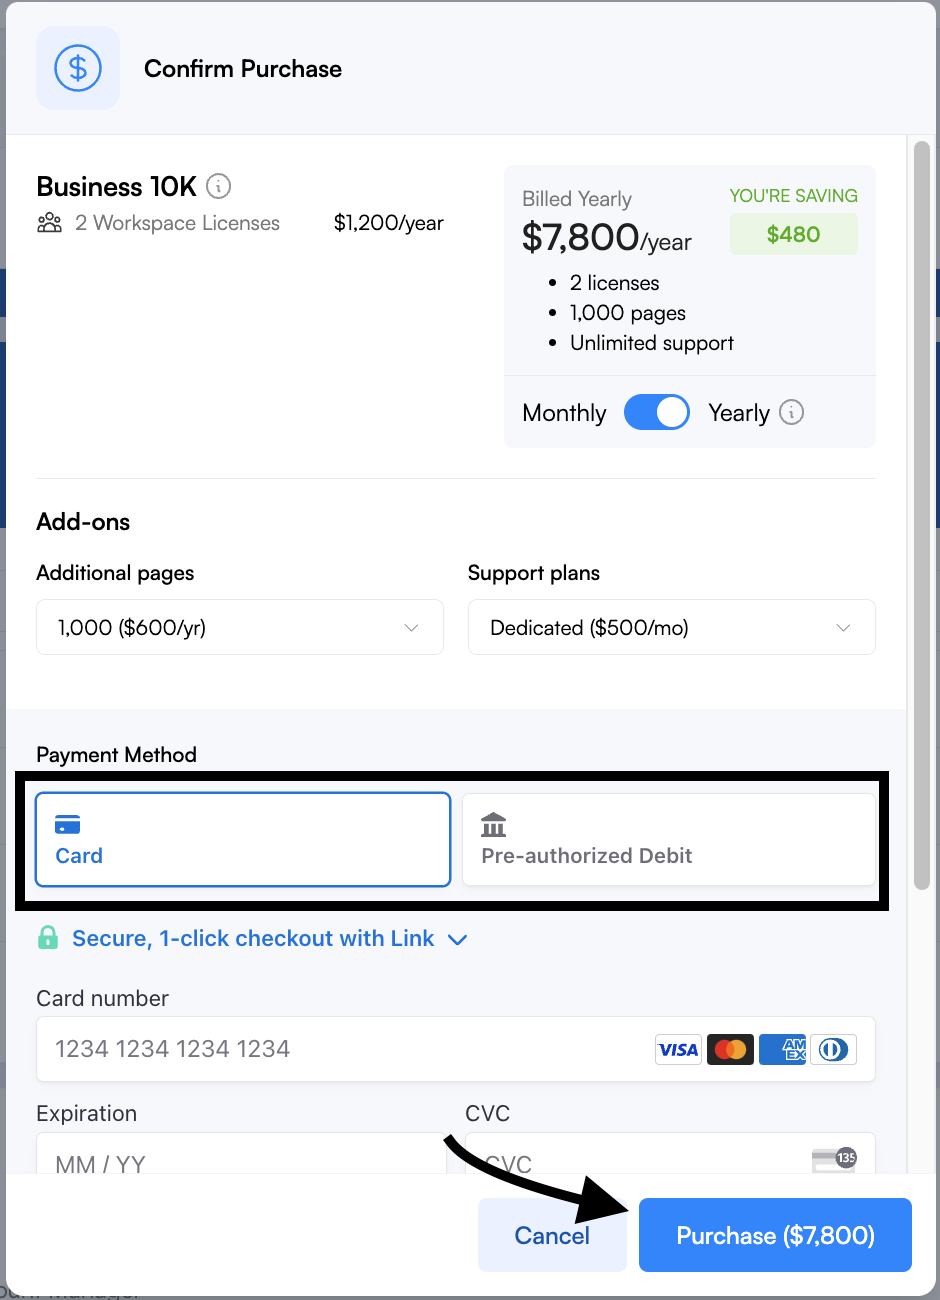
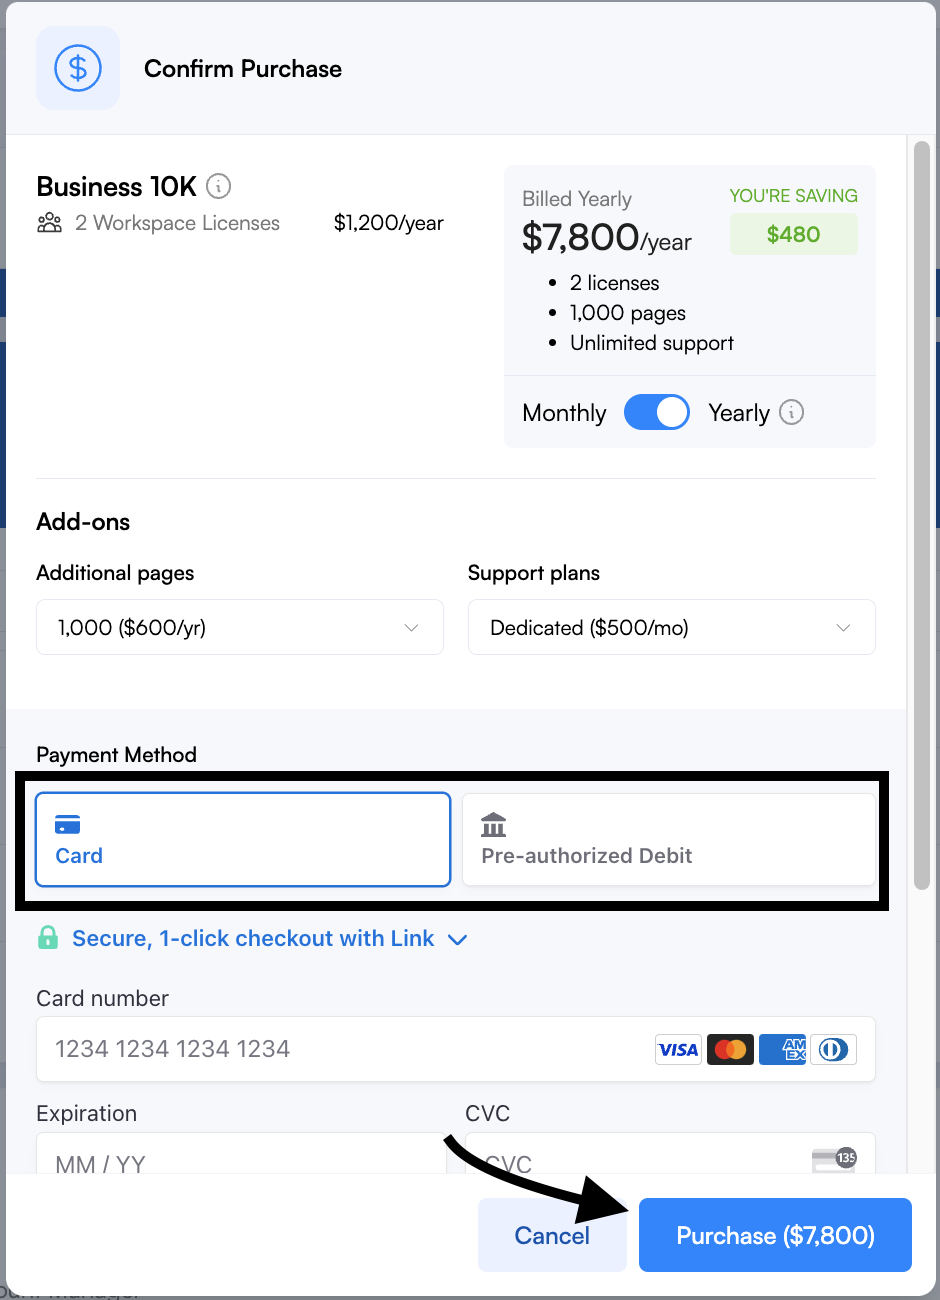
Review your plan details in the checkout panel. The checkout is handled securely through Stripe and supports all major credit cards, as well as PayPal. Any applicable taxes and eligible coupon codes are displayed before purchase. Click on Purchase to process the payment.


Personal and free plan to Business plan
Do the following to upgrade your Personal or Free plan to a Visualping for Business plan.
Note: Want to try Business before you buy? See Start a free Business trial above.
Steps:
From the Visualping dashboard, click the Account icon at the top right corner or click on Upgrade and skip to step 3.
On the drop-down menu, select Subscriptions under Settings.
On the Subscriptions page, click the arrow on the right side to view the Business plans.
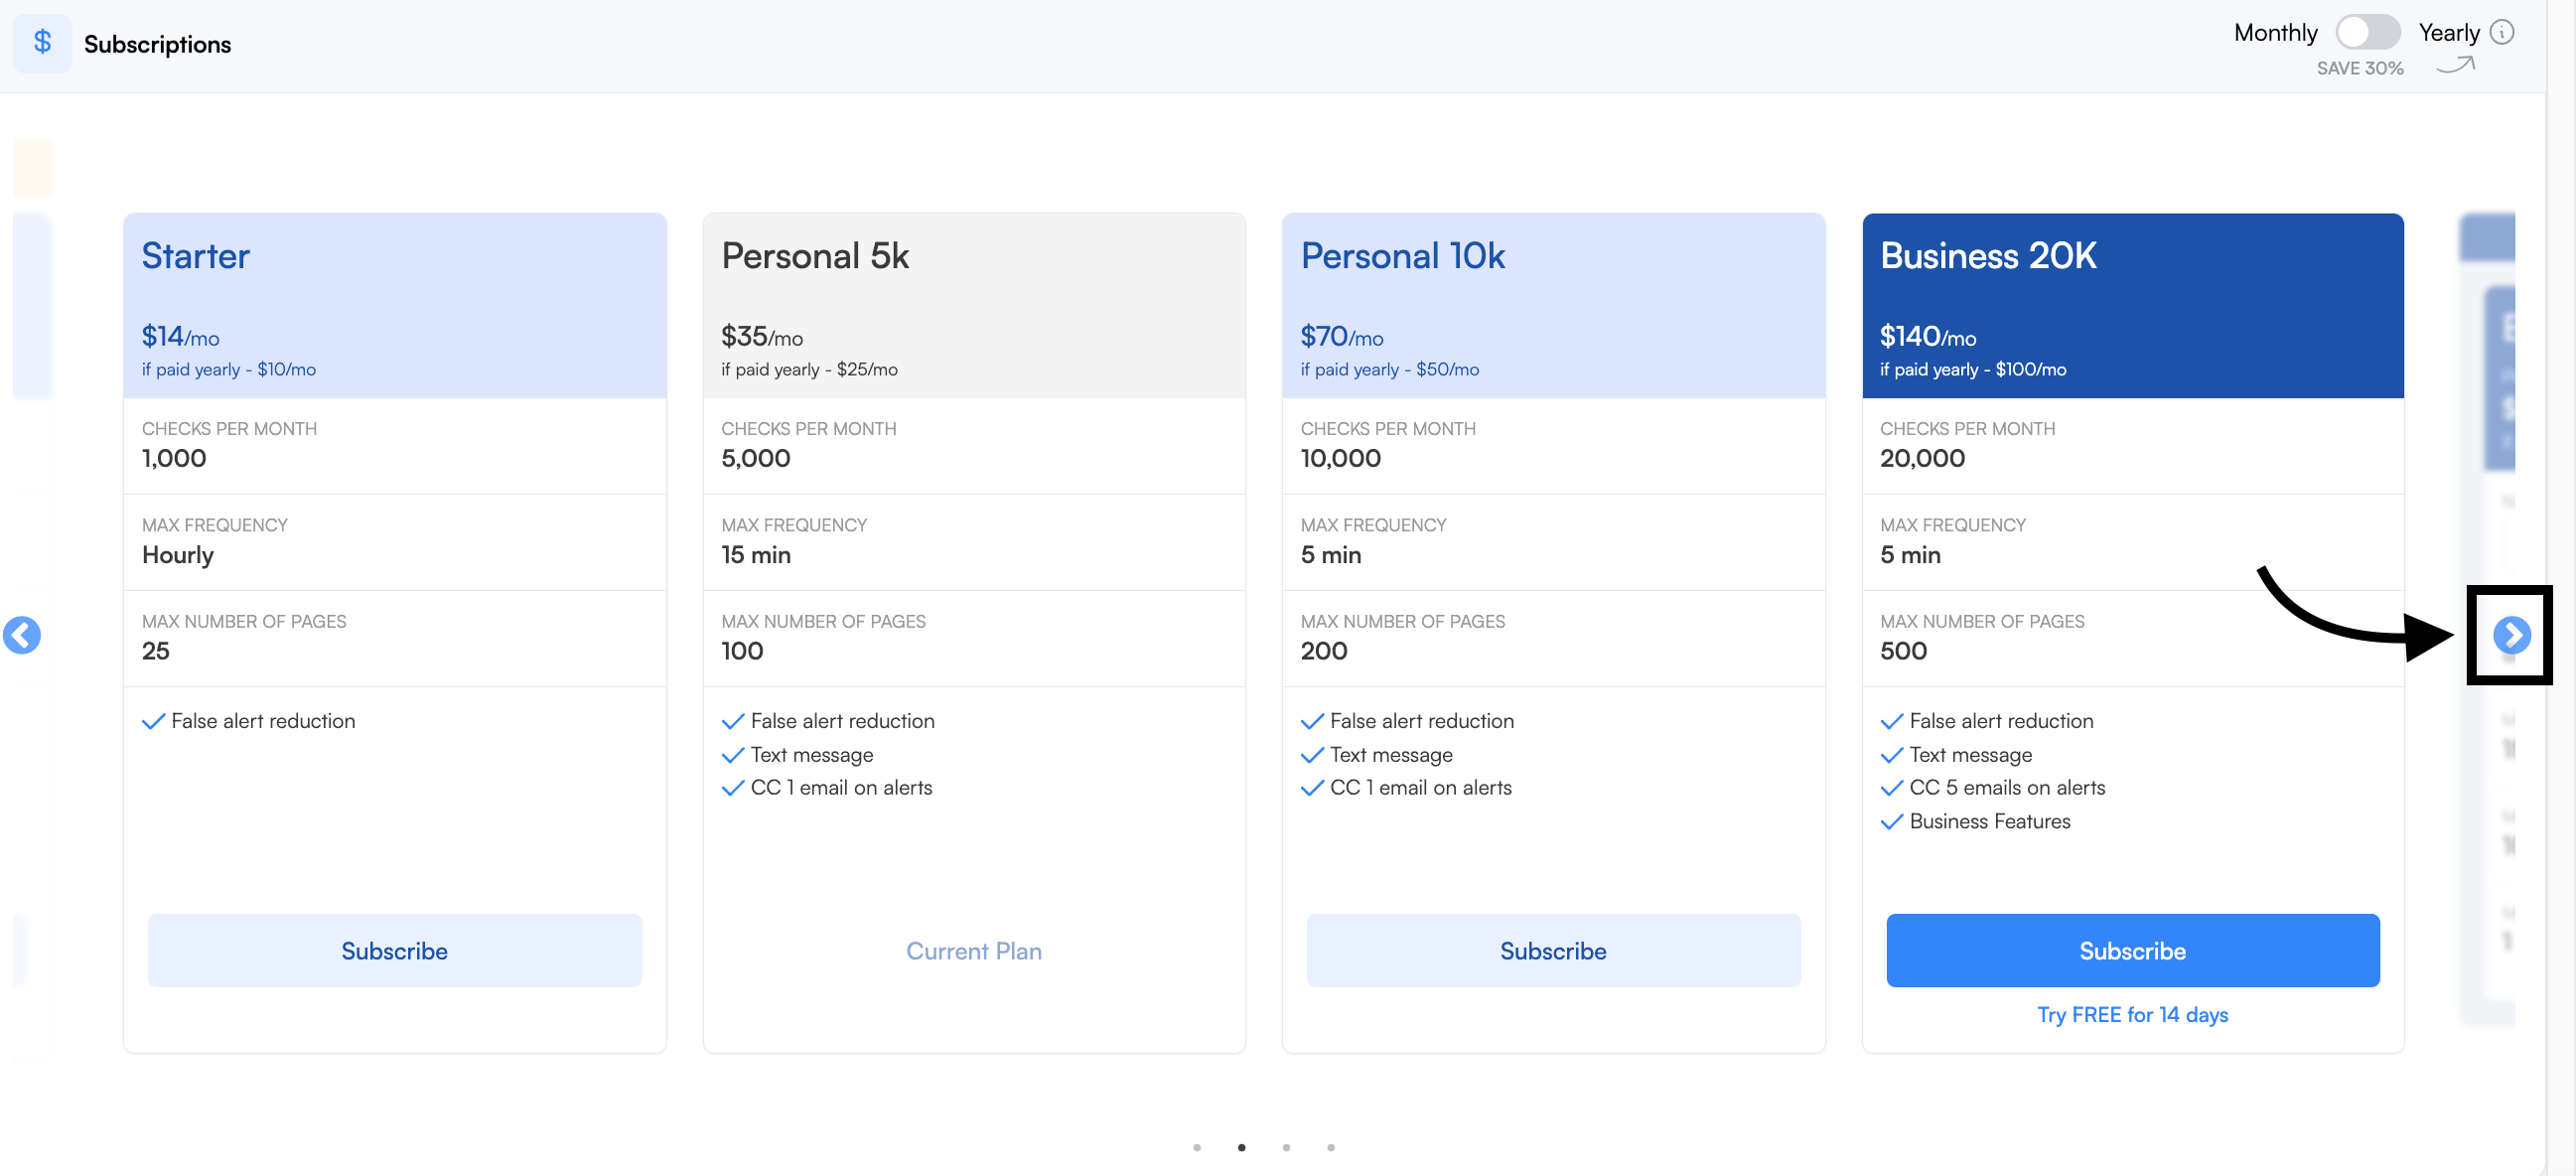
Select the number of Workspaces for your desired plan. You can mix and match the number of workspaces for each plan if needed.
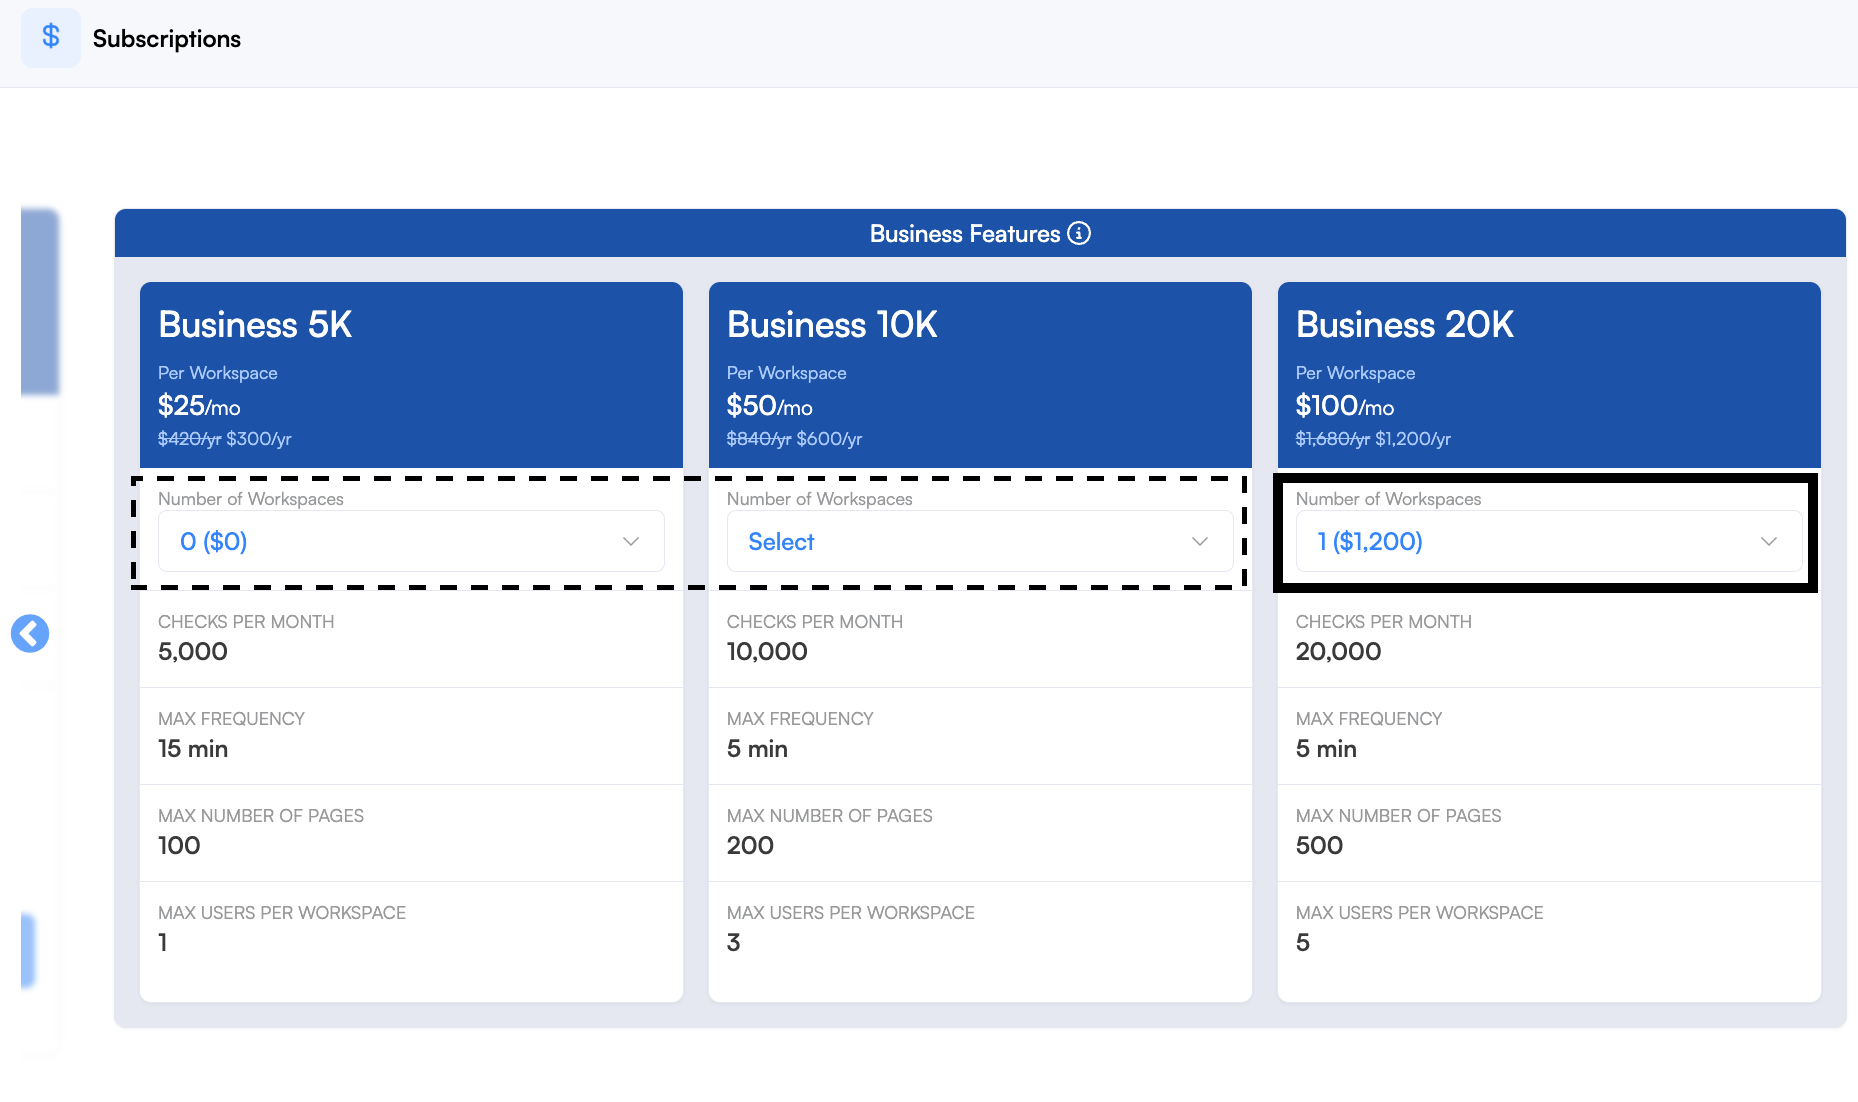
Your total will be displayed on the right side where you can toggle between monthly and annual billing (you save 30% on a yearly plan, risk-free). You can include optional Add-ons to your plan such as Additional pages and Support plans. Click on Checkout when you're done.
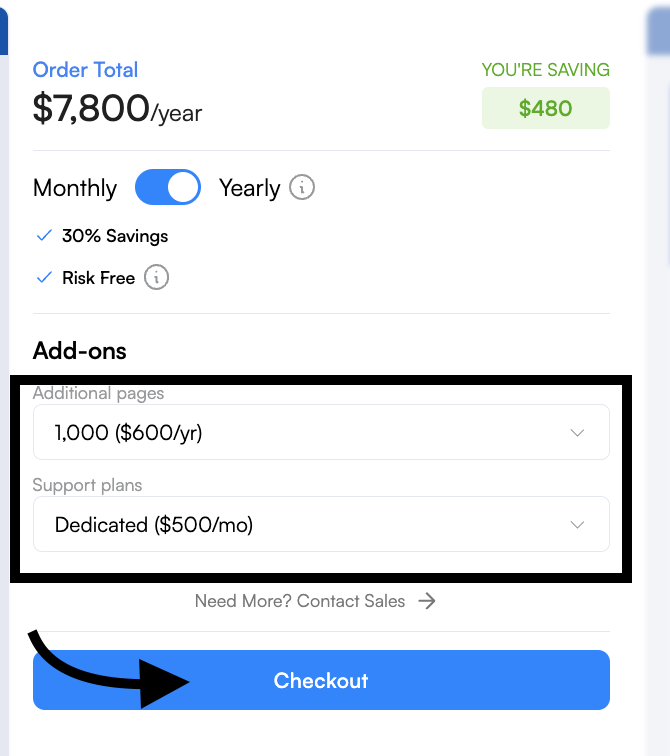
Review your plan details in the checkout panel. The checkout is handled securely through Stripe and supports all major credit cards, as well as PayPal. Any applicable taxes and eligible coupon codes are displayed before purchase. Click on Purchase to process the payment.


Please contact us if you have questions or need support.