
How to copy and paste monito settings.
Contents of this article
Why use the copy and paste feature
You can save time configuring monitor settings when creating monitors. With the Copy and Paste monitor settings functions, you can quickly copy an existing monitor's settings and paste them when creating new monitors individually or in bulk. This makes creating and duplicating monitors an easy task.
Note that in certain situations it is easier or better to use presets. For example when creating many monitors with the same or similar settings over a long time. Presets are easier in that case since you do not need to copy the settings every time, and you can instead rely on the preset being saved on your account.
How to copy monitor settings
You can copy the settings of an existing monitor from the dashboard in 2 ways. The copied settings are:
Actions
Adjustments
Notifications
Advanced Schedule
In the Dashboard
Step 1:
Select the monitor you want to copy the settings from
From the dashboard, select the monitor you want to copy the settings from.
Step 2:
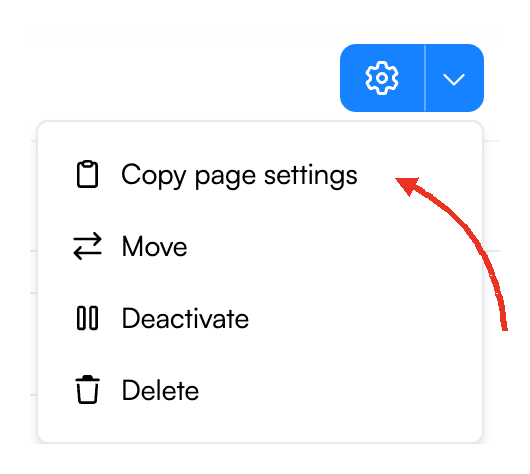
Click the arrow next to the settings button, then Copy page settings
At the top right of the monitor details, click the arrow next to the blue settings (gear) button and choose Copy page settings.
In the Monitor Settings
Step 1:
Select the monitor to open its details
From the dashboard, select the monitor whose settings you want to copy.
Step 2:
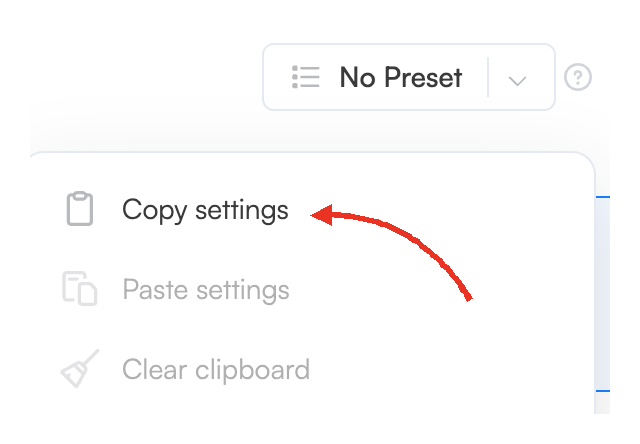
Click the Preset Dropdown Box found at the top right of the monitor details

Step 3:
Click on the Copy settings option from the list
How to paste monitor settings during bulk import
You can paste monitor settings when creating monitors in bulk. Important: this only works when bulk importing, and not bulk editing.
Step 1:
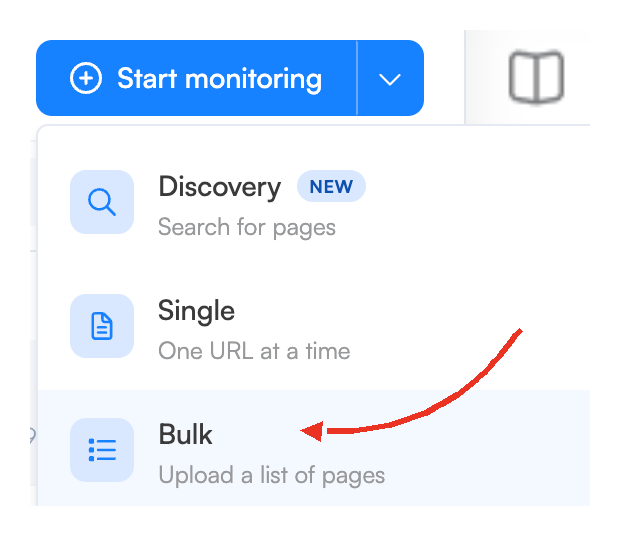
Open the Bulk tab of the monitor creator
From the dashboard, click the arrow next to Start monitoring and choose Bulk.
Step 2:
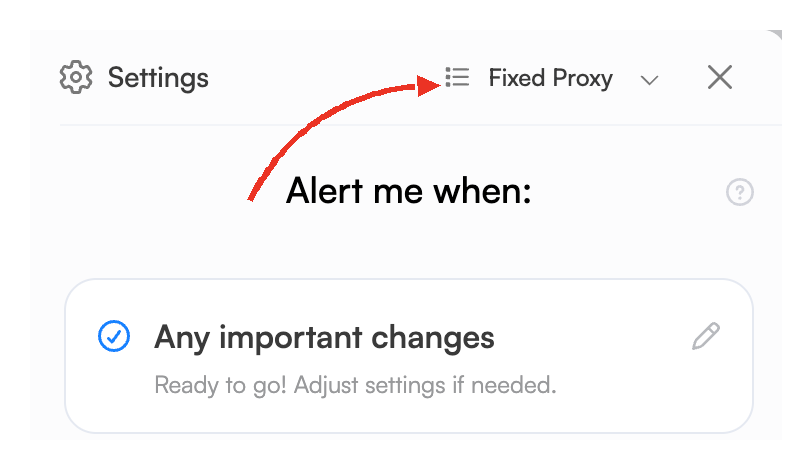
Add a page, then open the preset dropdown at the top right
Paste or type at least one valid page address in the list. The settings panel then slides in on the right. Click the preset dropdown at the top right of the settings panel.
Step 3:
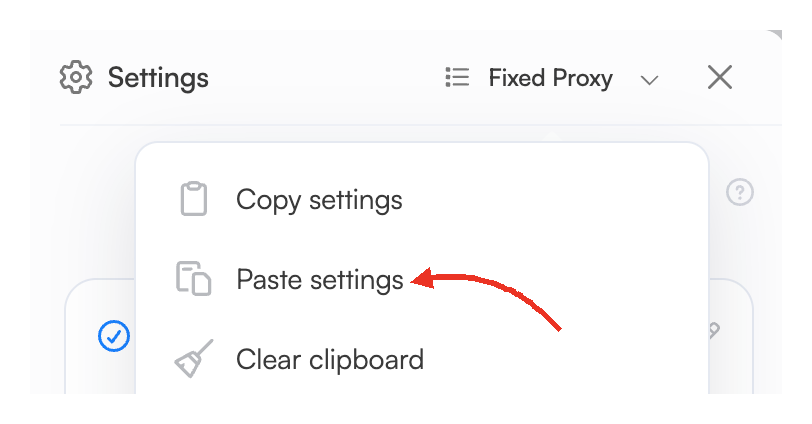
Select the Paste settings option
Step 4:
Add the rest of your pages, review the settings, then click Start monitoring
Set the check frequency, add a relevant prompt, and edit any other settings before you save.
How to paste monitor settings to a new or existing monitor
You can paste monitor settings when creating a new monitor or from the settings of an existing monitor. In the monitor creator, the settings panel with the preset dropdown appears once you enter a page URL and click Go. Pasting settings does not overwrite a URL you have already entered.
Step 0:
Copy the settings of the monitor you want to reuse
See How to copy monitor settings above.
Step 1:
Open the settings
From the dashboard, click Start monitoring, enter the page URL and click Go to create a new monitor, or open the settings of an existing monitor.

Step 2:
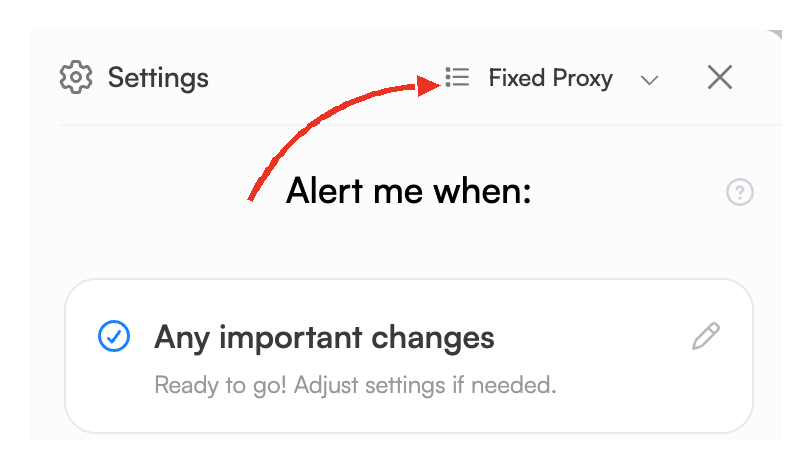
Click the preset dropdown at the top right of the settings
Step 3:
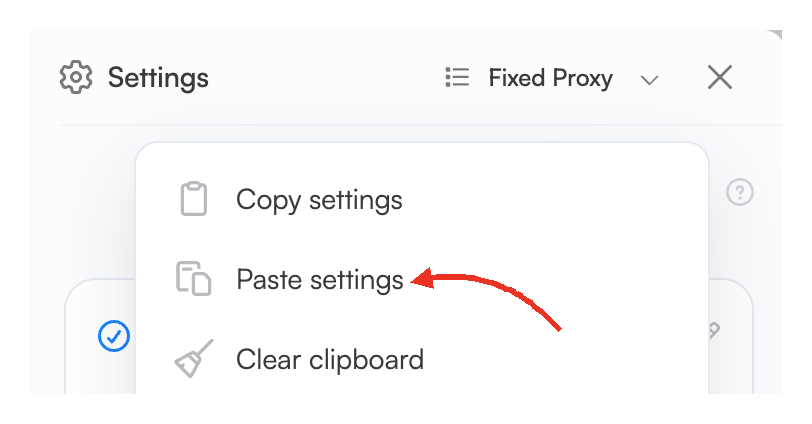
Select the Paste settings option
Step 4:
Save the monitor
For a new monitor, set the check frequency, add a relevant prompt, adjust any other settings, then click Start monitoring. For an existing monitor, save your changes.
If the monitor creator summarizes your alert condition under "We'll alert you when," click Edit to return the condition to the field and change it. The Edit link is hidden for custom prompts.
Frequently Asked Questions
Can I paste monitor settings when bulk editing?
No. Pasting monitor settings is not supported when bulk editing monitors.
Are check frequency and threshold copied too?
Yes. Check frequency and threshold are included when you copy or paste monitor settings.
Why do I need clipboard permission for this feature?
Browser clipboard permission is required to copy and paste monitor settings, since Visualping uses your browser's clipboard to temporarily store the settings you copy.