
Presets
Contents of this article
Why should I use presets?
For a business managing high-volume monitoring, Presets are essential for ensuring consistency and scalability across hundreds of jobs. By utilizing standardized presets, you eliminate repetitive manual configuration, drastically reducing the risk of human error. This automation transforms a tedious setup process into a streamlined workflow, allowing your team to focus on analyzing data rather than managing settings.
Note: this feature is only available for users with Business plans.
How to save and use presets
Note: Presets are available across all jobs in an organization.
Step 1:
Open the template job's settings
Find the job you wish to save the settings of and open its settings.
Step 2:
Save to preset
In the top-right of the settings, open the preset dropdown and use Save as preset from the footer.
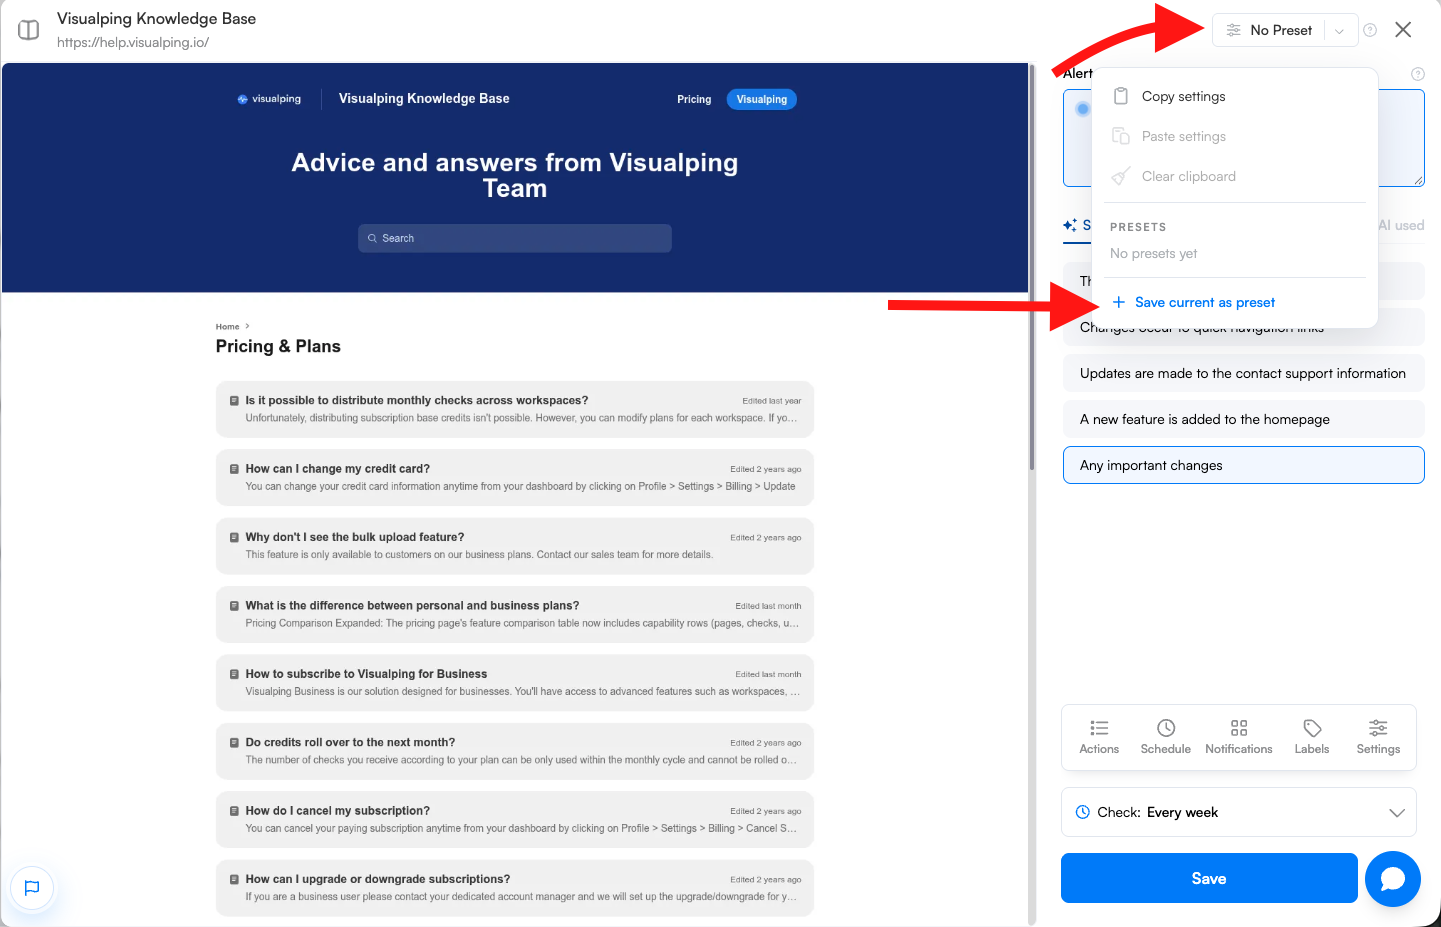
Enter a name for the preset, then confirm by clicking on the checkmark.

Step 3:
Open the relevant job's settings
In the settings of the job whose settings need to be updated, new or old, open the dropdown again and select the preset of your choice from the list.
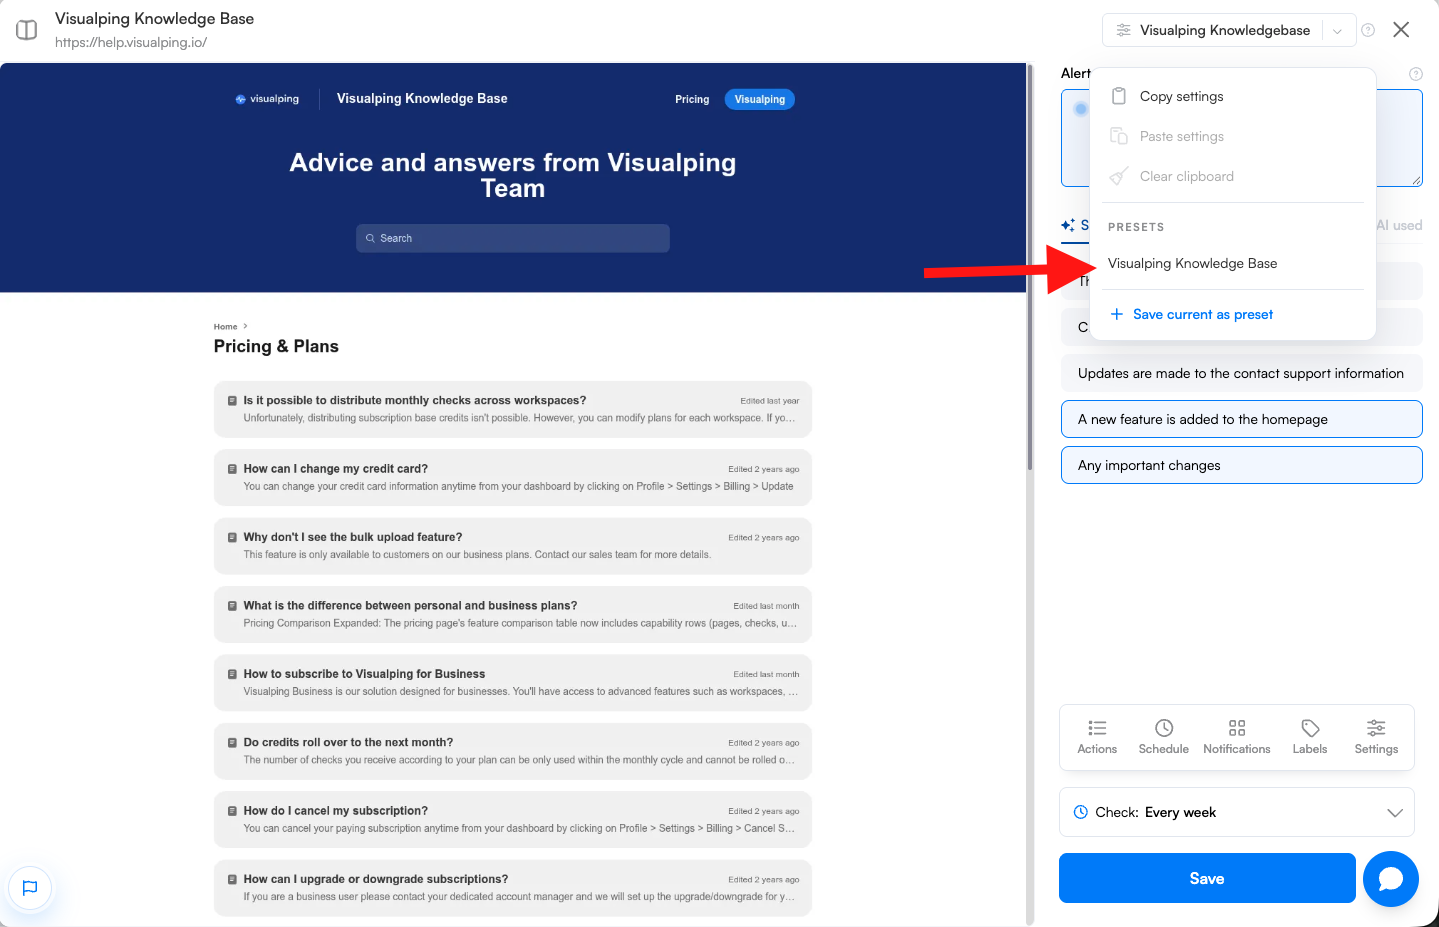
Note that applying a preset will override any existing settings.
How to set default settings
Note: Default settings are local to a workspace.
Step 1:
Save the preset which will be default
Follow the steps above to create a preset for the settings that you wish to use as this workspace's default. Default settings will be applied when creating new jobs, without affecting current job settings.
Step 2:
Set as default
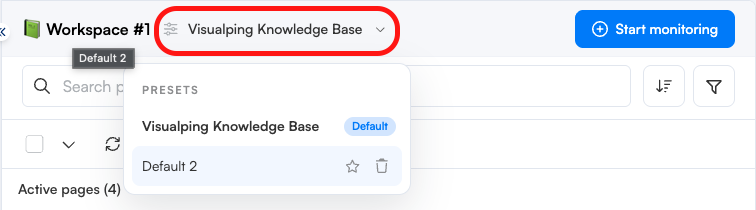
From the job settings, hover over the preset of your choice and click the star icon to set it as the default. The current default preset shows a blue badge in the list.
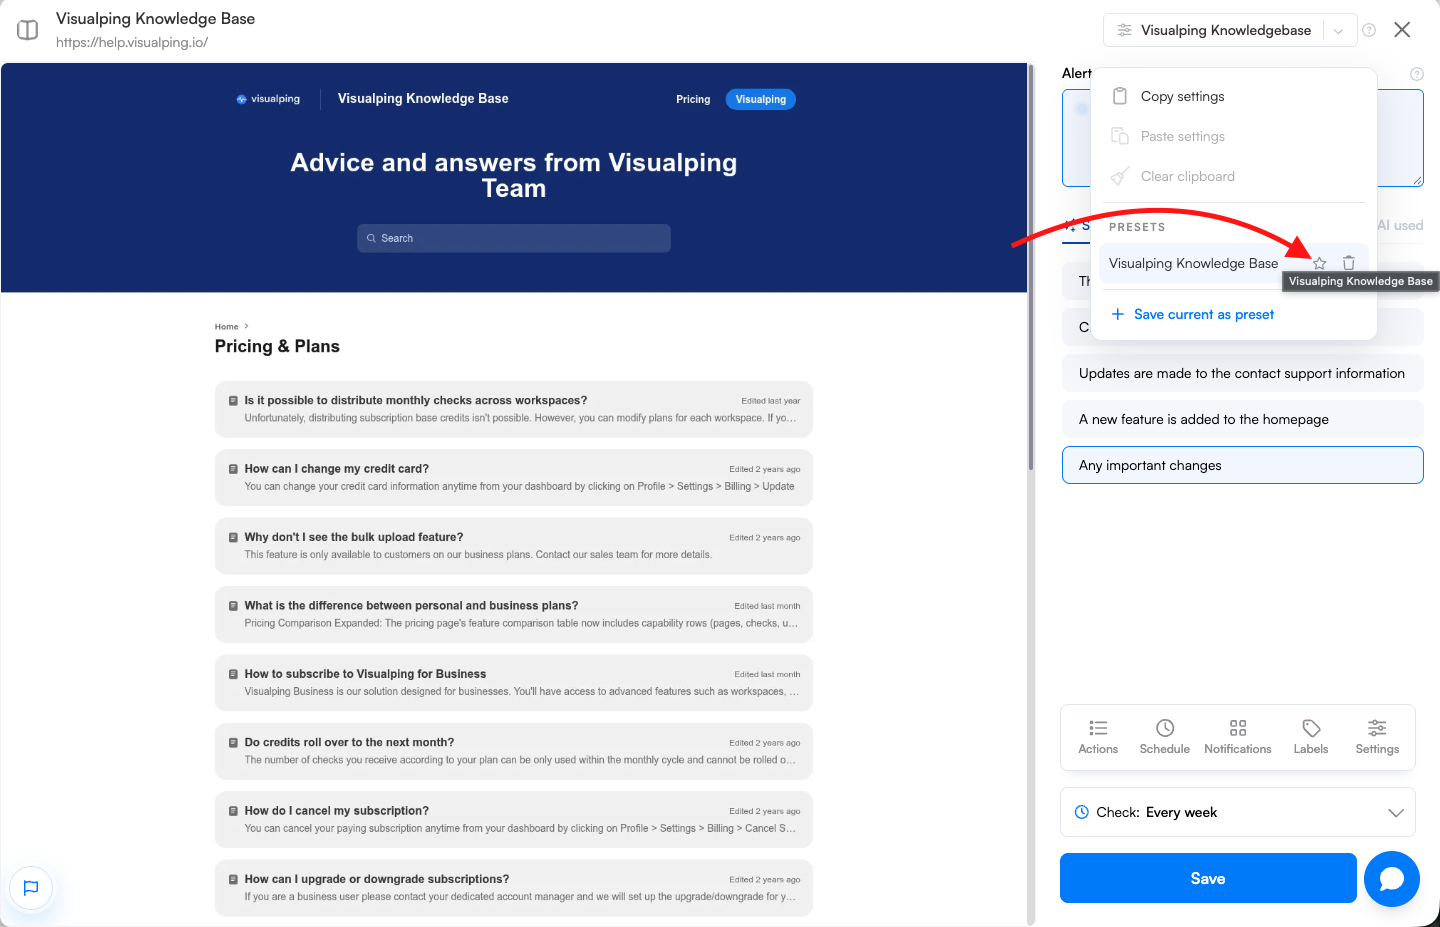
After clicking the star icon, it will look like the image below:

Or choose a preset to be the default directly from the dashboard.
Applying presets in bulk
Business users can now apply a saved preset when using the bulk job settings editor. This lets you standardize configuration across many jobs at once without opening each job individually.
Steps:
Select the jobs you want to update from the dashboard using the checkboxes.
Click Job Settings in the bulk action toolbar.
In the bulk settings panel, open the preset dropdown and select the preset you want to apply.
Click Save to apply the preset to all selected jobs.
Note: Applying a preset in bulk will override the existing settings for all selected jobs. Review your selection carefully before saving.
Frequently Asked Questions
What scope do presets cover?
Presets are organization-wide, so you can save a preset in one workspace and use it in another workspace.
What jobs are affected by default settings?
All new jobs added to the workspace will use the default settings. Default settings are not available across different workspaces.
What settings are saved in a preset?
All important settings are saved. This includes the AI prompt, Actions, Keywords, Compare Type, check frequency, and Advanced Settings. However, the URL and job title will not be saved, as well as any job specific details such as the job history.