How to create a basic monitoring job
Contents of this article
Welcome to Visualping!
In this learning guide, you'll learn how to get started with Visualping. We'll show you how to monitor web pages, utilize AI to get important alerts and reduce false positives. When finished, you'll be able to monitor almost any webpage confidently and accurately. We are super excited to have you here!
What can you do with Visualping?
Visualping has been detecting website changes, since 2015, for millions of users, around the world. Here is a summary of some use cases.
Monitor latest biomedical research in various journals and publications.
Check competitor offerings and changes in pricing models.
Get notified about new political and corporate press releases.
Track eBay, Amazon, and Kijiji product listings.
Get alerts for real-estate price changes.
Monitor google search rankings.
Receive alerts for changes in government regulations.
How to create a new monitoring job?
Step 1:
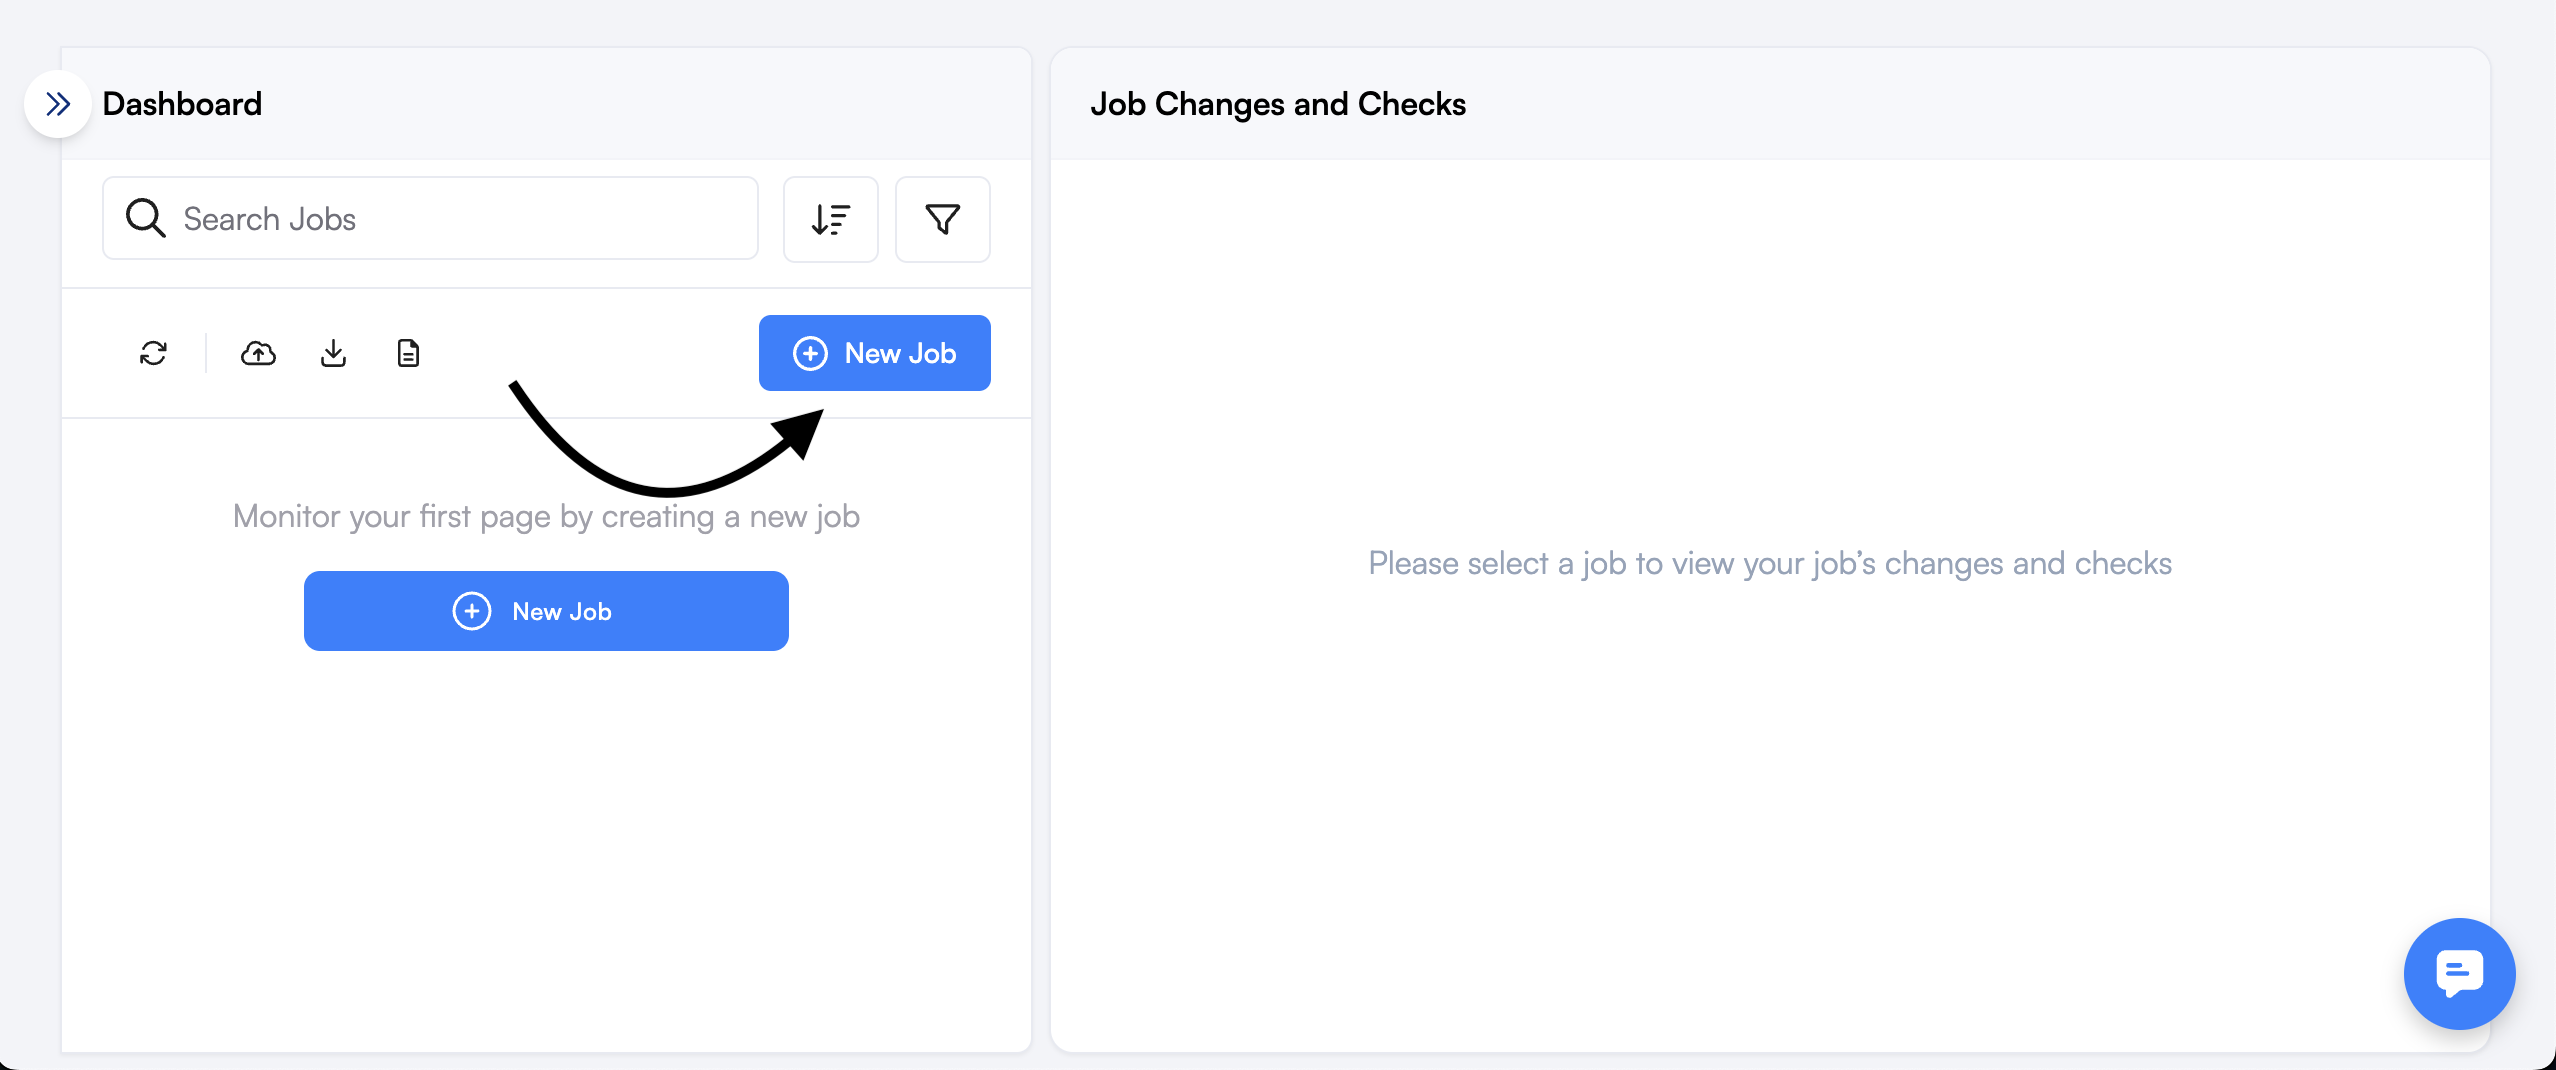
Making a New Job
You might want to note that we call monitoring tasks "jobs" for the rest of this lesson, as well as on our website.
First, copy the URL of the page you want to monitor. Then, create a new job on the Visualping dashboard.
Pro Tip: You'll want to get a direct link, if possible. For example, if you're planning to monitor Google search results, make sure to use the URL with the URL search parameter. The following are URLs that will lead you directly to Google search results and other exact full page URL that will lead you to a site's subpage.
https://www.google.com/search?q=visualpinghttps://www.google.com/search?q=best+visual+webpage+monitoring+toolshttps://visualping.io/bloghttps://www.canada.ca/en/revenue-agency/services/tax/individuals/frequently-asked-questions-individuals/canadian-income-tax-rates-individuals-current-previous-years.htmlIf you can't get to the page you want directly by URL, no worries, you can use Click actions to interact with the page.
Step 2:
Paste the URL in the input field and click Go.

Step 3:
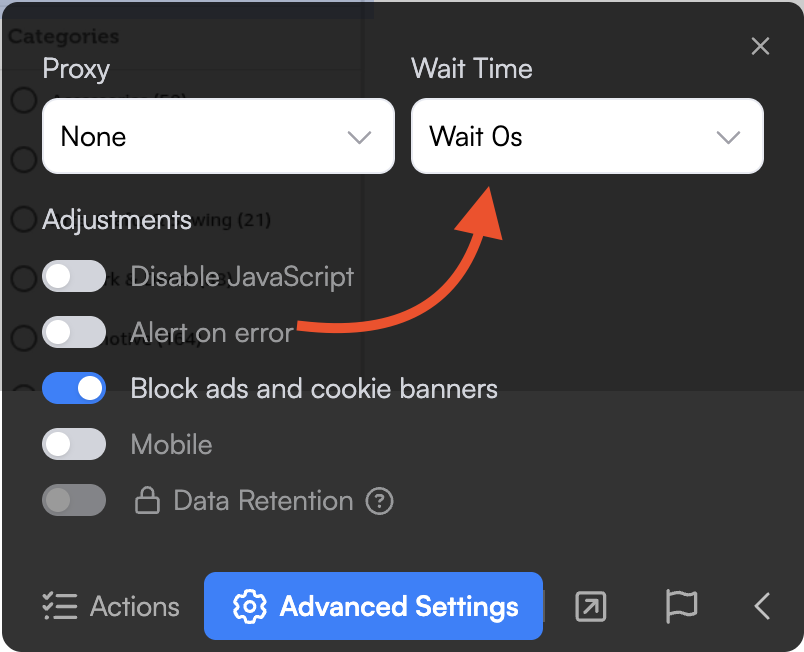
Adding a wait time
Take a look at the preview window. Did the page load correctly? Are there missing elements? If all looks good, you can go ahead and skip this step.
Sometimes web pages take longer to load than others for various reasons from page size to network traffic. While our system can auto-detect whether a page has finished loading, in some cases elements may not load. To solve this, we can tell the job to wait and give the page some more time to load.
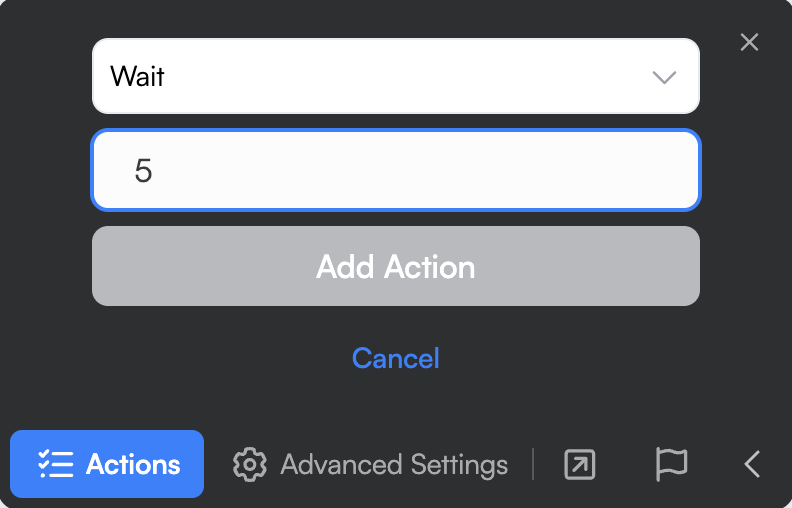
Open the Advanced Settings panel and select your wait time from the dropdown.
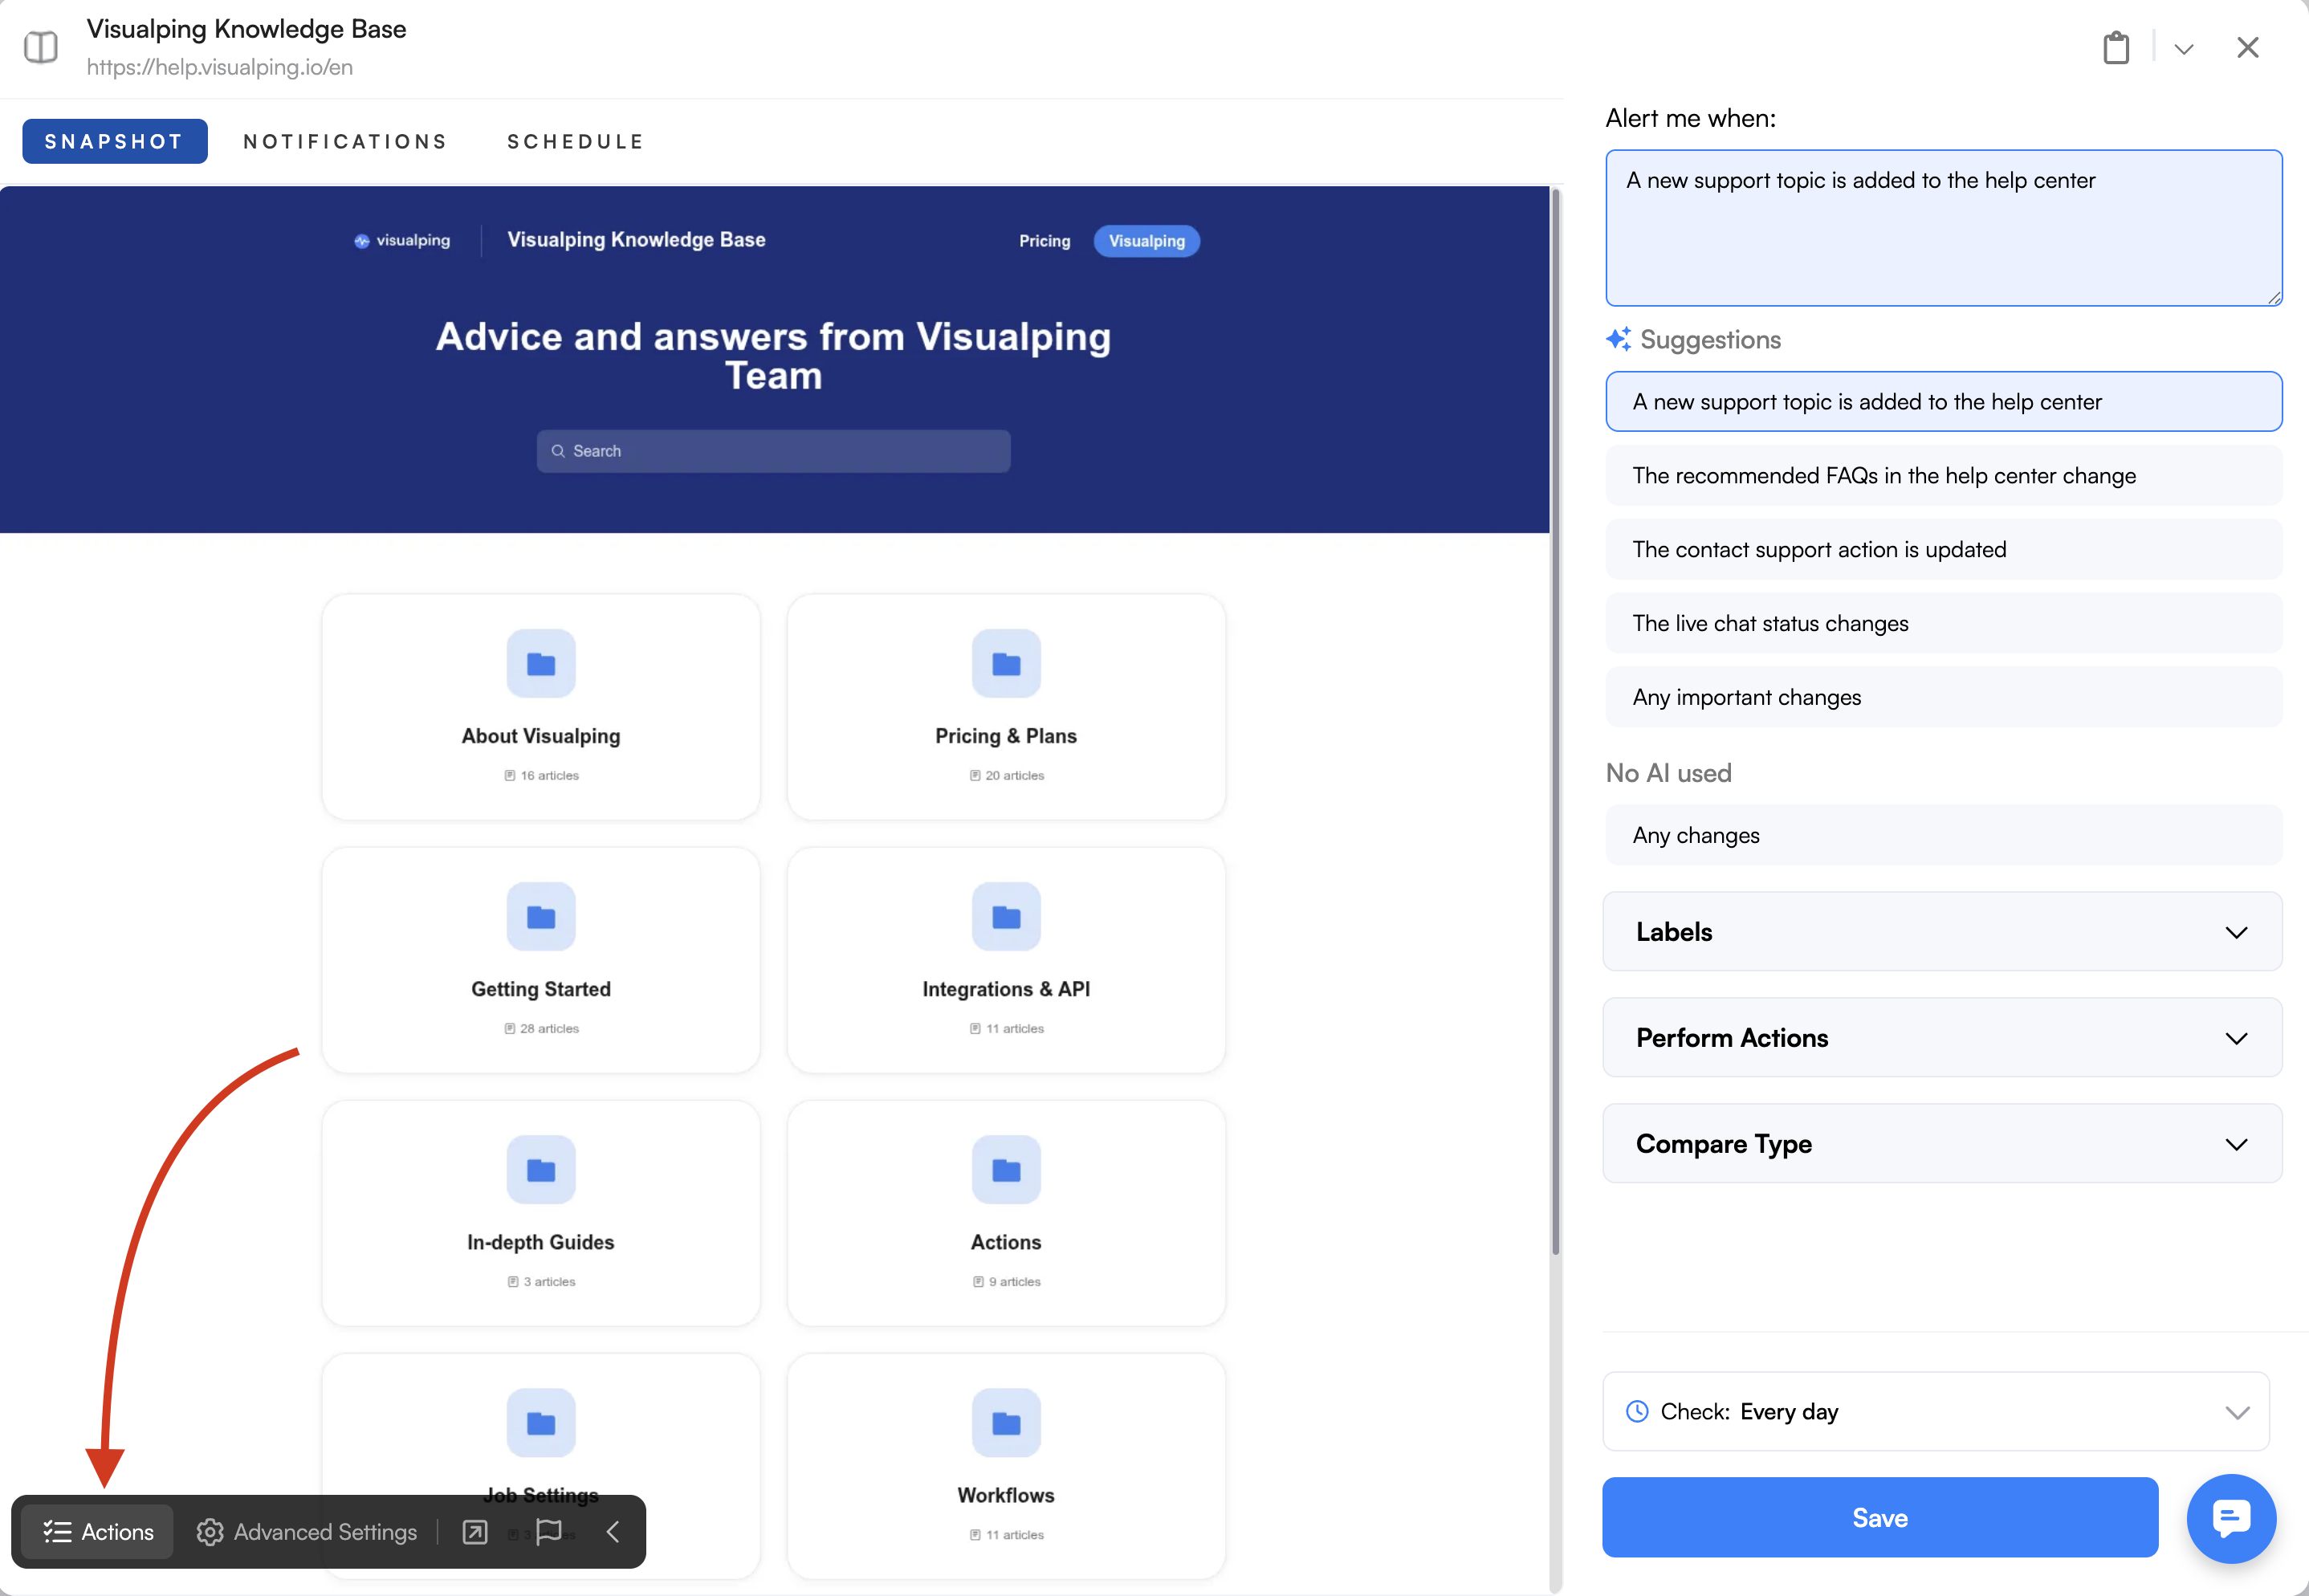
Another way to add additional time is through the Actions panel.
Step 4:
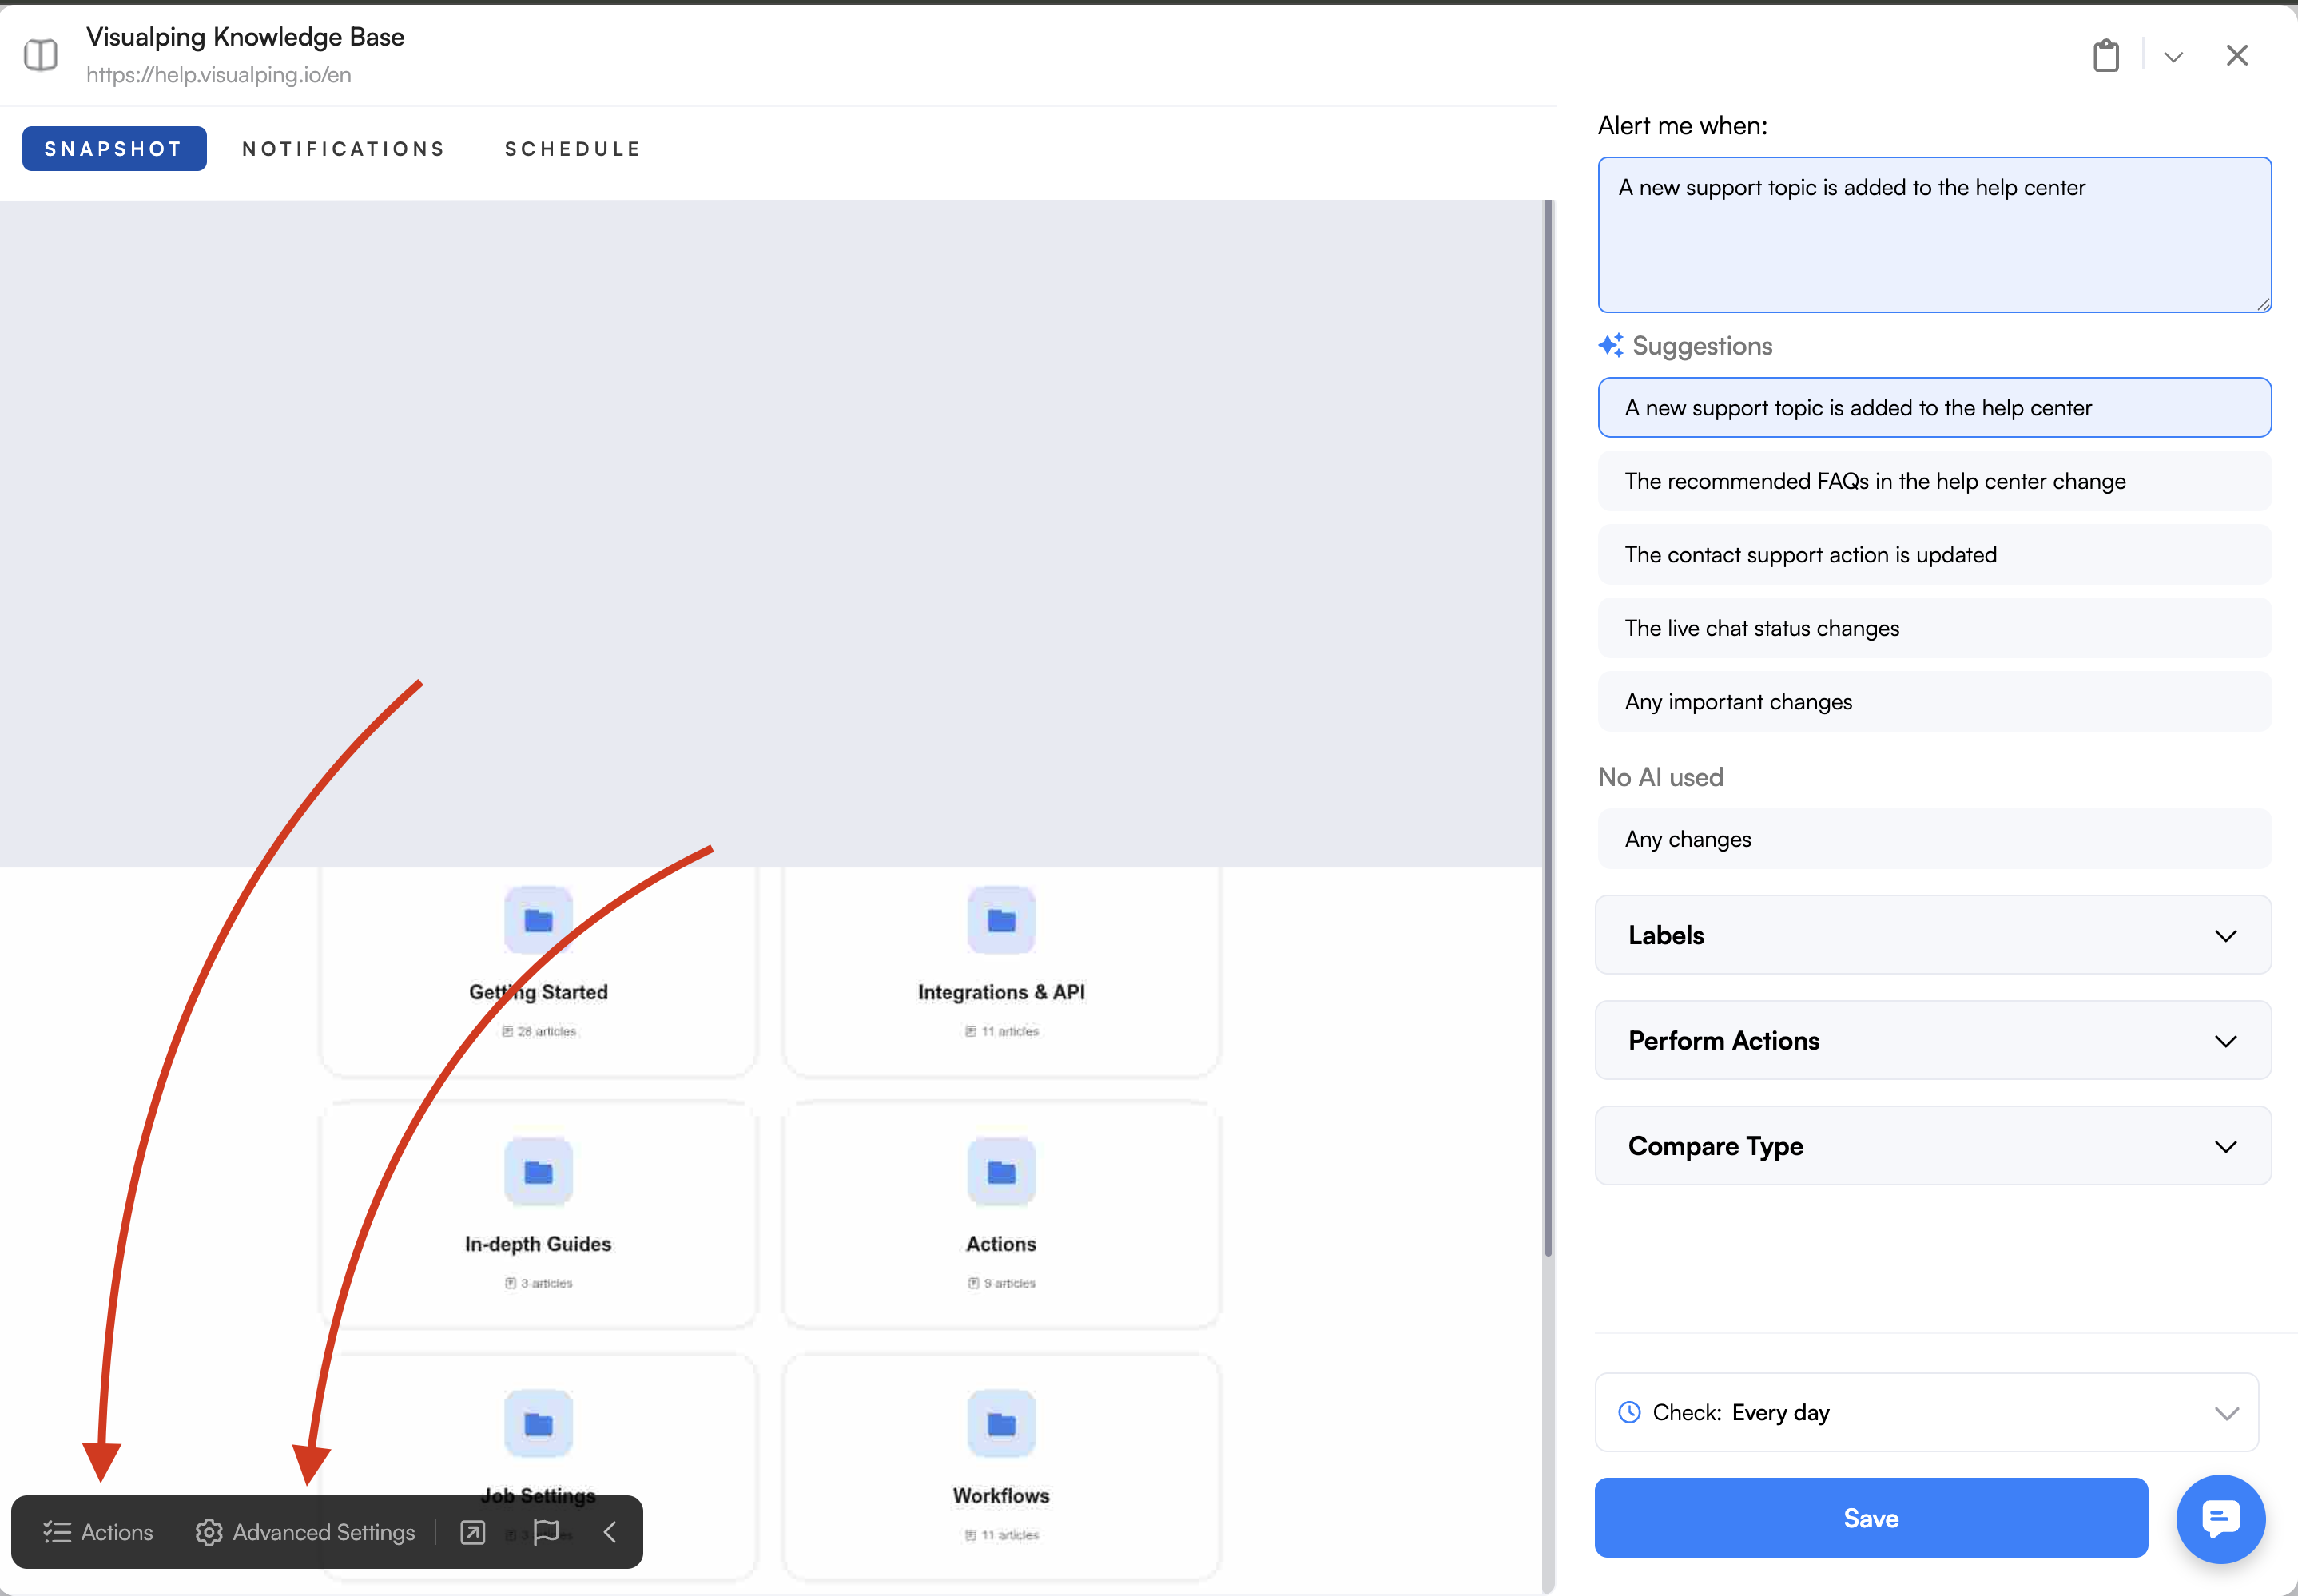
Setting up AI instructions
For most jobs, this part is the most important and the only thing you really need to worry about. By giving the AI an accurate prompt, you will only get alerted for what really matters without having to worry about complicated settings.
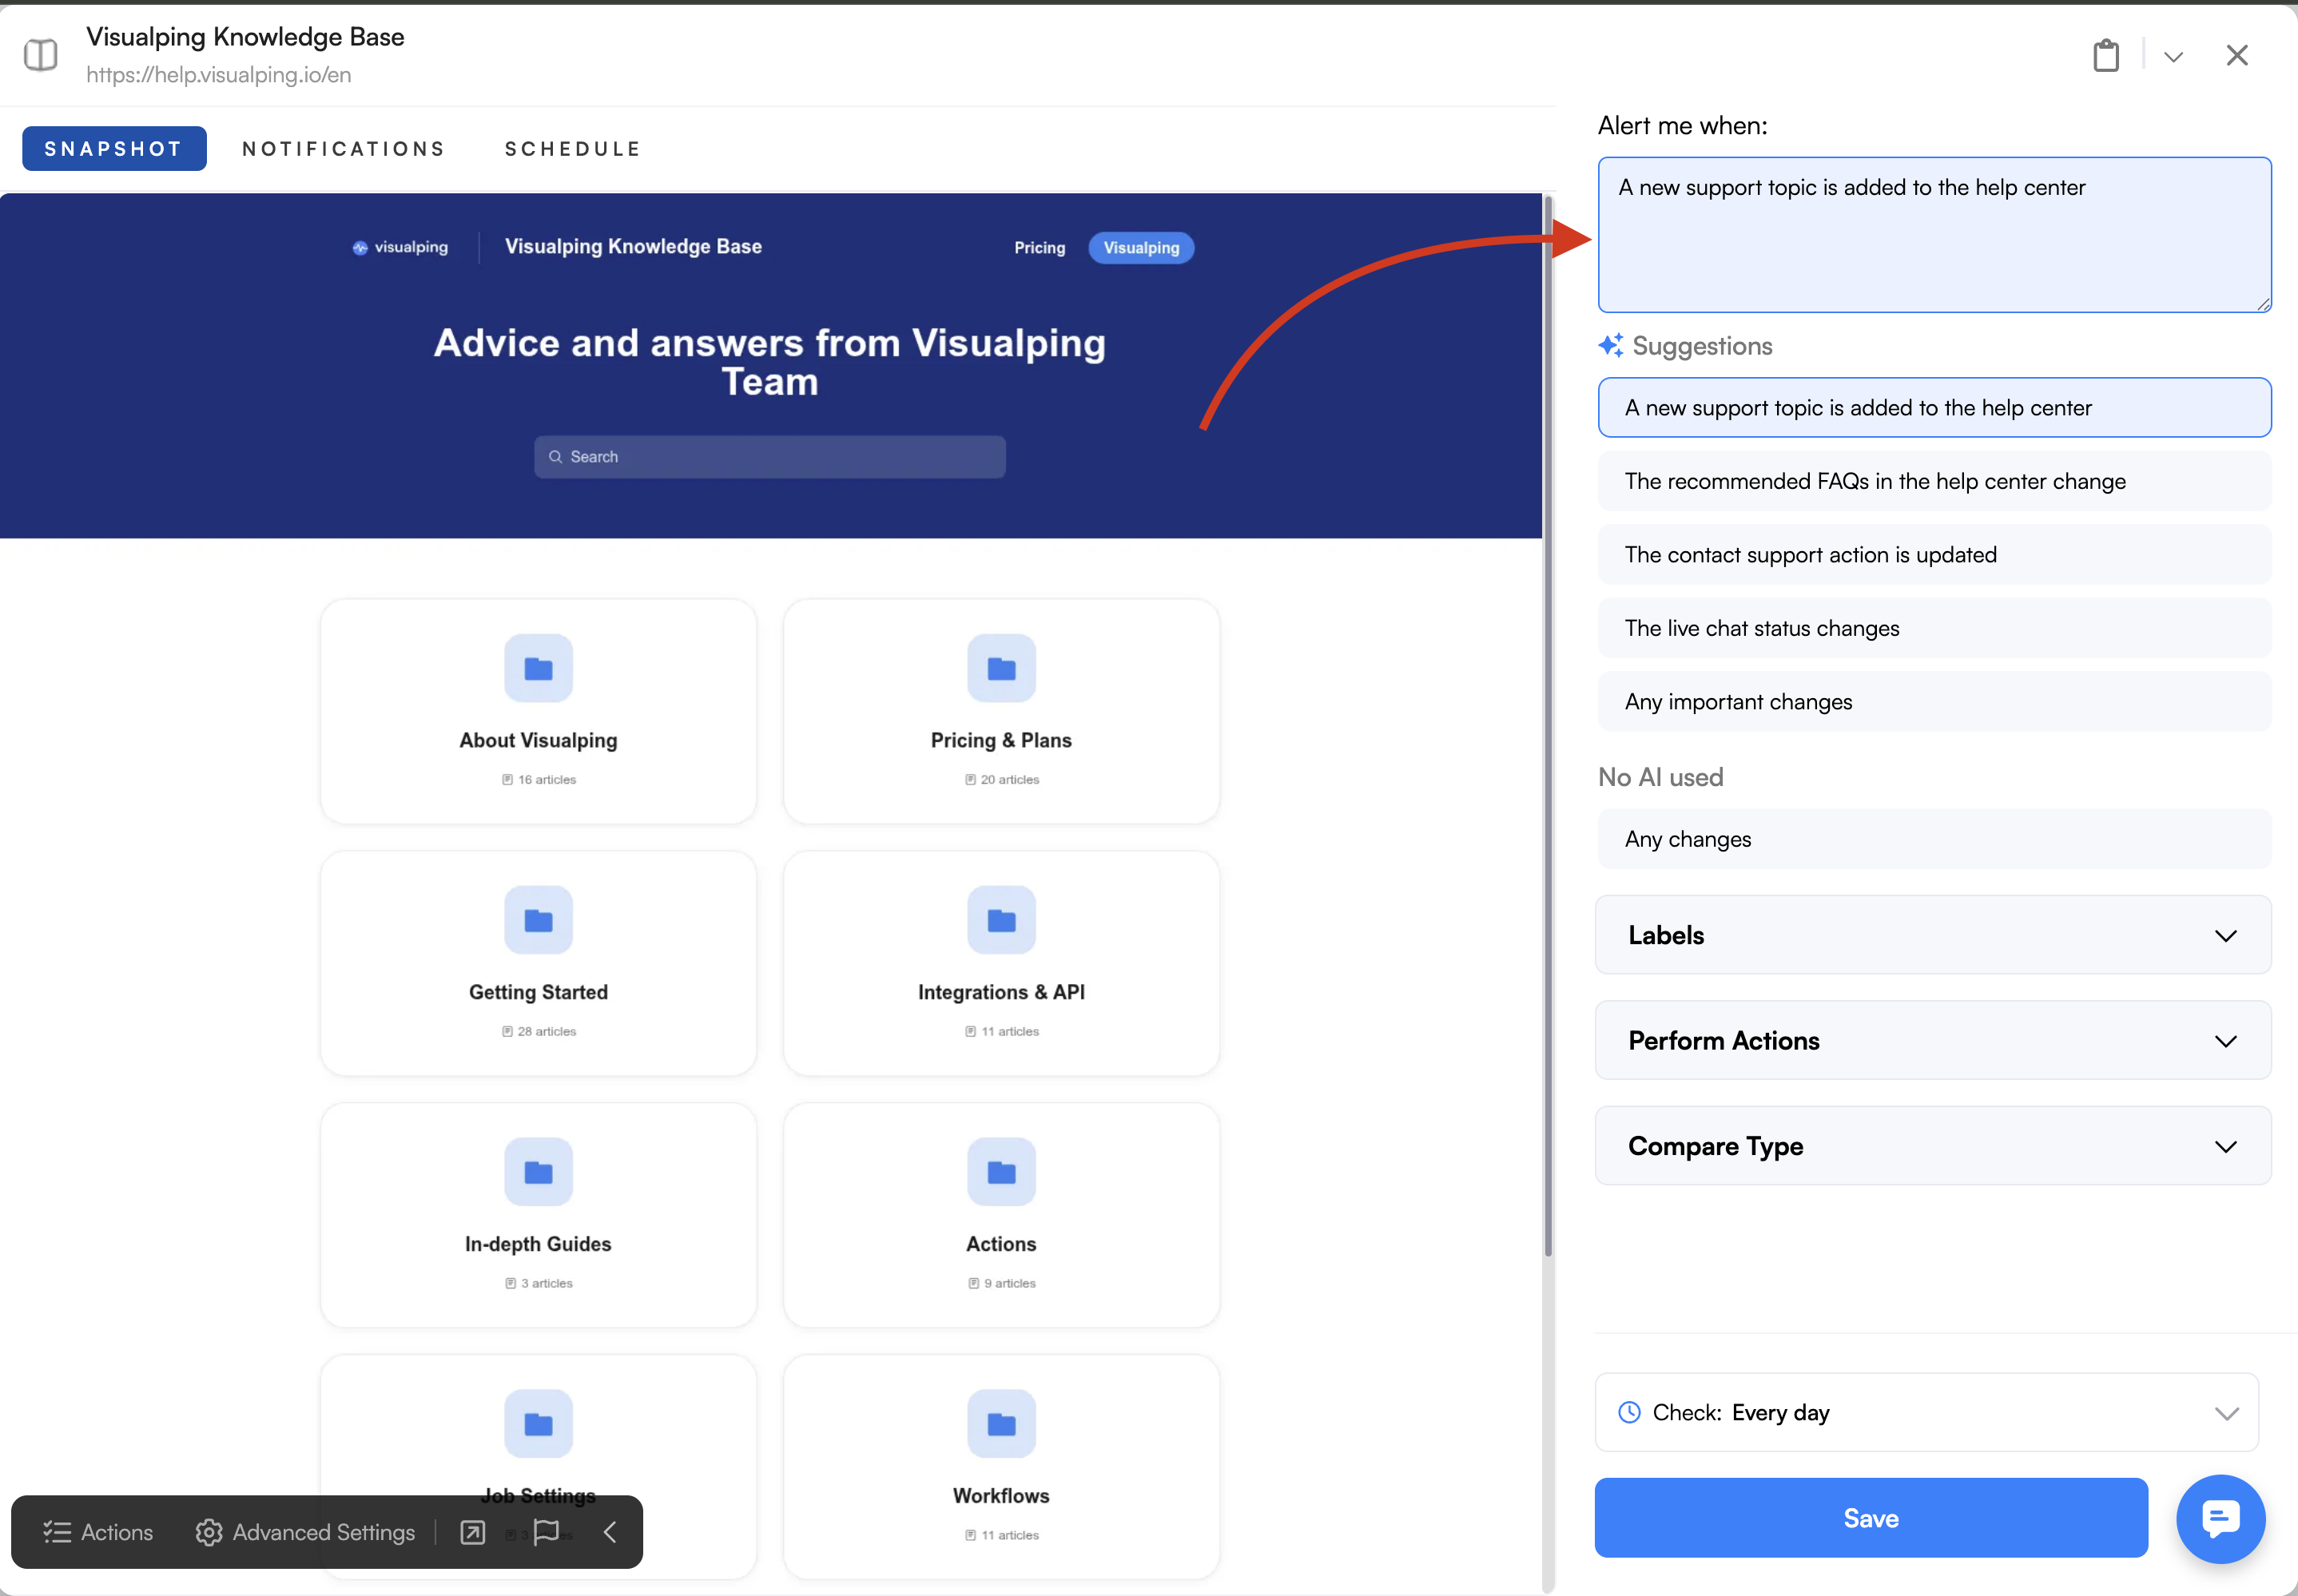
Our AI will offer you suggestions tailored to the job, you can pick and choose one of them if it offers your desired behavior.
If you do not have anything specific to monitor, choose Any important changes. This option focuses on core page content and ignores minor or expected changes such as errors, cookie popups, weather, timestamps, and similar updates.
If you need more control, you can enter your own criteria in the text box or add additional instructions.
If you want alerts for any change, regardless of importance, choose Any changes. Be aware that this option may generate more false alerts.
Pro Tip: a good AI prompt is accurate, use precise keywords and concise phrases. For example, a good prompt is "the price of the item lowers" or "a new article is added in Getting Started", a bad prompt could look like "something changes" or "a new thing is added". Having a good prompt ensures you only get notified about what really matters to you. Here are more details on making good prompts.
Step 5:
Finishing Up
Now you just need to select how often the page will be checked for changes. Note that changes are not detected as soon as they happen, a check needs to happen before you can be alerted. Higher frequencies are available on higher plans, however, the higher the frequency, the more checks this job uses.

Finally, click on the Start Monitoring button and your job will become active.
If you are running into issues such as pop-ups, banners, logins, or drop-downs keep reading.
Are elements blocking your page? Need to click on the page, type, scroll, or log in?
No website is alike. Sometimes you'll run into popups, annoying banners, login pages, and drop-downs. Fortunately, Visualping's action tools can help you. To learn more about actions click here. To learn how to log in on a page in visualping click here.
Troubleshooting Tips
Selection tool not working?
If you can't select an element using the selection tool or if it doesn't click, block or type here are some common solutions.
Can't see the entire page?
Try using the scroll action.
We have page limitations.
Getting false positives?
Bot detection? Security checks? Geo-block?
Disable the "Block ads and cookies" option in advanced settings.
Still having issues?
If none of the troubleshooting steps above resolve the problem, or if you are running into technical issues, reach out to our Support team. Include the page URL, what you were trying to do, and any error messages so we can help faster.
Related Articles
How to make reports (Business only)
Setting up message notifications (Personal 5k and above)
Setting up Discord notifications (Business only)
Setting up Slack notifications (Business only)
Setting up Teams notifications (Business only)